One of the extra expenses in moving to recent Nikon cameras is that they are designed to with with flashes that use Nikon’s interesting i-TTL flash system. It’s an innovative system that uses flashes of light to communicate data, but one that I’ve not found entirely meets my need.
Apart from making older flash units like my perfectly serviceable Nikon SB-80DX apparently redundant, it also appears to make my older non-Nikon units unusable as well. Of course this isn’t really the case – just that they don’t work as i-TTL units.
Perhaps even more annoying, with i-TTL there seems to be a longer delay, at least with the Nikon D200, between the pre-flash – used for measurement – and the actual exposure flash. Long enough for many people to blink. As a work-around you can make one normal flash exposure and then lock the flash setting (perhaps using FV lock: CS f4) so that there is no pre-flash for further exposures. Its probably fine for some situations, but not for those where your subject is changing rapidly – most of what I do.

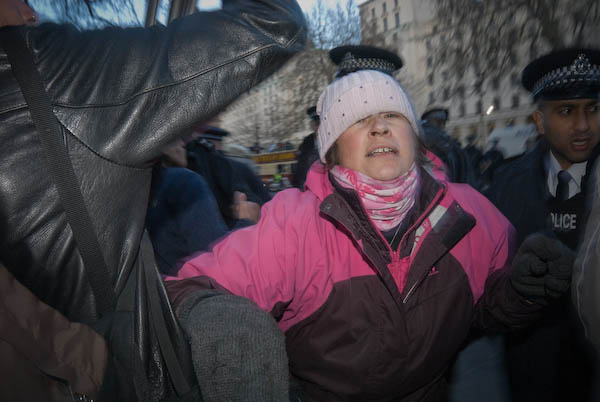
‘Freedom to Protest’? Police get heavy-handed at Downing St, Jan 12, 2008.
More pictures on My London Diary.
D200 with SB-80DX, 1/30 f8. EXIF indicates “strobe return light not detected” but we know better. I used the settings below.
(C) Peter Marshall.
Important: You follow the advice given here entirely at your own risk. Some older flash units put high voltages on the hot shoe which may fry modern cameras. You should test older flashes before using them on any modern camera.
The only flash unit I’ve tried the method here with is a Nikon SB-80DX, but it should work with any unit that has an auto-exposure mode that allows you to select the aperture setting. The detailed instructions are for a Nikon D200, but there is no reason why a similar method shouldn’t work with other cameras.
- Fit flash to hot shoe.
- Turn on camera. Use the button to the left of the lens mount and set the flash to normal front curtain sync mode. (It won’t work in rear curtain sync, and you are better off never using red-eye reduction – correct it in software if you get it. The +/- flash exposure compensation setting using the flash button has no effect with this method, so don’t bother with it.)
- Set camera to A (Aperture Priority Auto) mode.
- Set the aperture and film speed you want to work at. In this example I’ll use f8 and ISO 400
- Turn on the flash, using up/down on the main control button to change the flashing ISO to 400, then press it to set.
- Set the flash mode on the flash to A.
- Set the aperture on the flash unit relative to that you set on the camera. As a starting point, set it one stop wider – f5.6 in this example. The important thing to remember is that setting a wider aperture gives less light and vice-versa. (For more precise control you could alter the ISO, but on the SB-80DX this is trickier to do. You may find it easier to start by setting the ISO on the flash to twice the figure on the camera.)
- On the camera, go to CS e2 and set the minimum shutter speed to use with flash. To use the flash as fill in daylight I usually set 1/60 or 1/125. In low light I generally want to use a slower speed (often 1/15 or 1/30) to get a little more exposure from the ambient light. For nice long blurs use a slower speed.
- Use CS e1 to set the flash sync to 1/250 (Auto FP) or 1/250.
- Everything should now work ok. But take a test shot and check the histogram.
Remember that setting exposure compensation will have no affect on the flash – but will alter the ambient contribution (if any) to exposure. To change the flash exposure you need to alter the aperture (or ISO) set on the flash unit.
If you find things start going wrong with your flash exposures, the first thing to check are that you haven’t changed either the Exposure Mode (A) or Flash Mode (front curtain sync.) It is surprisingly easy to press buttons without meaning to!
Peter Marshall