Many photographers prefer to print their own work, and I’m one of them, although I realise the difference that a skilled printer can make. It took me years of work- perhaps around seven or eight – before I was usually happy with the results I was getting, and I had one of the best teachers, if only in book form, Ansel Adams. But of course there were also many things I worked out for myself, and a few picked up from other photographers and printers.
I can’t claim to be a great printer, certainly not in the same league as Voja Mitrovic, but I certainly became a reasonably adequate one, and was fairly often asked by others if I would make prints for them. But I had a job, and I didn’t want another one, so I always refused. I’m not sure if it would have worked, or whether as I suspect my skills were very specific to my own work and my own negatives. I have occasionally had my work printed by other people, though never any of the truly great printers, but the best black and white prints of my own work have been those I’ve made myself.
Now that darkrooms are more or less a thing of the past, and we almost all print using a computer, it’s rather easier for anyone to acquire the technical skills (though many struggle.) But the hardest aspect, knowing what a good print would look like, is still much the same.

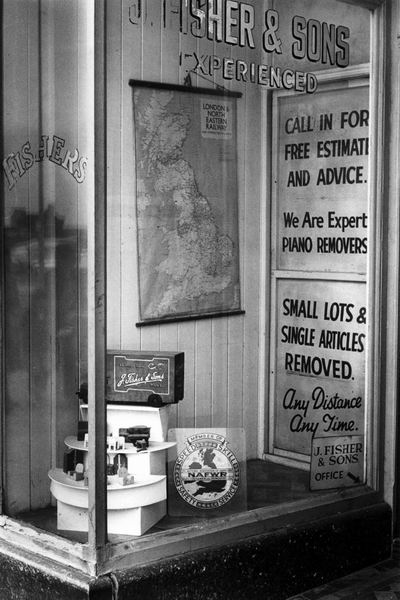
At the moment I’m working on the first major project I produced in the early 1980’s on Kingston upon Hull. Most of the prints were made on Agfa Portriga grade 3 (and later on Record Rapid) both now long discontinued. Their formulation had changed considerably earlier to remove cadmium, and certainly Record Rapid was never the same again.
Portriga had a warmer tone (in the right developer you could get a kind of chocolate brown that most people took for a toned print) and Record Rapid was a warm neutral but both were capable of very deep blacks and a kind of velvet quality with pearly whites. I consistently overdeveloped both papers, using either Agfa’s own Neutol developer at higher than normal concentration or, better still, May and Baker’s Teknol, formulated for use in tropical darkrooms, which I used at 23-24 degrees.
Even if I wanted to, I could no longer get the same print quality in the darkroom with modern materials. And today I would find it very hard to perform the tricky dodging and burning that I managed in my youth, some of which is still roughly recorded on the back of the contact sheets but these sketches will still come in useful when printing on the computer.
The original prints I made for the show were deliberately, perhaps wilfully small at 105 x161mm, (4.13 x 6.3″) over, designed to be viewed intimately by people with good eyesight! The just over 4x enlargement gave images from 35mm (mainly taken on a Leica M2 with a 35mm Summilux lens, though later I moved on to an Olympus OM2) a large-format quality even though only on a small scale. They were designed so that either a portrait or landscape format image could be mounted on a 10″ wide by 9″ high card, which where then mainly shown as groups of four in 20×18″ frames.
I’m intending to show this work in a group show where I have only an 8 by 4 foot panel rather than the top floor of a large gallery they filled in 1983, so I won’t have all 148 prints on show. But printing digitally does make it a lot easier to make several prints on a single sheet of paper, as well as simplifying the process of dodging and burning.
Good digital prints start from good scans, which is where the dedicated film scanner helps. Scanning the large number of negatives is a little of a chore, and at the moment I’m perhaps a third of the way through. I use VueScan software because I find it easier to control (and it gives great results with colour negative) and gives very good scans, and I’ve written a very short guide on how I scan b/w negs with it.
The scans are saved as 16 bit TIF files, using my default working space for greyscale, Grey Gamma 2.2, usually a good choice for greyscale images as it is almost identical for them to sRGB. In Photoshop I rotate them as needed (using Photoshop’s ‘Measure Tool‘ to mark along one edge of the image area, then Image, Rotate Canvas, Abritrary to make it accurately horizontal before cropping with the rectangular marquee. I then do a quick and rough correction using the levels command and/or the curves command before archiving the files to DVD and to an external hard disk. This means I can always go back to this file at this state should I mess it up in some way, and I’ll not need to re-scan.
Further work on the file includes the inevitable spotting, mainly with the Healing Brush, but occasionally some areas need the Clone tool. That’s generally the longest part of the process and I’ll usually update the archive file on the external hard disk after this is done.
Next comes dodging and burning, mainly by selecting areas with the lasso tool, feathering them by an appropriate amount (anywhere from 5 – 200 pixels, depending on the size of the area and only using low values where an object selected has a clearly defined edge) and then using the levels command, with values between 1.10 and 0.90. If a greater amount of burning or dodging is required, it’s normally better to build it up using different selection areas, made by moving the original selection or using the Select Modify command or the image can start to show distinct boundaries where burning has taken place.
As well as dodging and burning to get the results I want will also require some tweaking of the image curve, either for the whole file or for selected areas – again making sure to feather any selection appropriately.
Its easier to do most of this work with a stylus rather than a mouse, and in some ways I’m as busy as I used to be working in the darkroom, but for much longer on each image. But there are two good sides to this; first you can take a break whenever you want and nothing will change, and second that when you’ve done it for the file you never have to do it again.
Again I usually update the archive file on the external hard drive when the file is exactly how I want it.
Usually I print from Photoshop, using either a Cone Piezography Quad Grey ink set on matte paper (usually Hahnemuhle Photorag) or Epson Ultrachrome K3 inks using the Epson ABW (Advanced Black and White) on a fibre based glossy paper. Both methods can give excellent results, and once images are framed under glass the different Dmax are seldom important. Although matte papers have a considerably lower DMax they can still seem black and the mid tones can be stunning.
For printing I take the saved 16 bit file and convert to 8 bits (unless I’m using a specialist print driver that works with 16 bit files.) The Cone inks I have are only suitable for matte papers, and as they work through an ICC profile it’s possible to ‘soft proof’ the file on Photoshop, giving an on-screen version of what the printed version will look like. You can then add adjustment layers to the file to compensate for the effect of the ink and paper. I’ve always used Epson printers (since one early and slightly unfortunate experience with another brand) and as well as Epson’s own solutions for them, they have the widest range of support outside this.
Printer manufacturers would like you to always use their paper with the printer and seem to deliberately make using it with other papers difficult by making the details of how the printer driver works. Sometimes I use a print ‘rip’, third party software that sends data direct to the printer rather than to the manufacturer’s print driver. Particularly if you want to use specialised black and white inksets, then the shareware ‘Quad Tone Rip‘ is excellent value, and it will also work with the Epson Inks, though of course limited by them – and if you print just using the three blacks you get a slightly unpleasant greenish black. Quadtone Rip has tools to enable you to produce profiles for soft proofing, but I’ve not used it.
Epson do not make grey profiles available for their ABW system and there are none I can find to download for the Epson 2400 printer that I use, although some have been made available for the Epson 3800, and may work with some other printers If you want to use ABW, you should read the lengthy report by Garry Eskin, which greatly clarifies some of the aspects that Epson deliberately keep quiet about. I usually only use it for Epson’s own poorly named Archival Matte (which is at least matte) and for third-party gloss papers with which ABW seems to pose fewer problems.
As Eskin notes, using gloss papers you can usually get a reasonable match by simply using the Tone setting. This appears to be a gamma setting, changing the mid point but not altering the white or black points. The ‘Dark’ setting seems often to be better than the ‘Normal’ setting or the apparently default ‘Darker.’
Media type and ‘Paper Config’ settings in the Printer driver are also important. The media type alters not only the warmth of the black, but also the maximum amount of ink used – watercolour papers which are more absorbent apparently need to have less ink used. Probably its best to start with the type recommended by the paper maker.
The amount of ink can also be altered in the ‘Paper Config’ dialogue, using the ‘Color Density’ setting. I often find prints can be improved by setting this at around -10% and it will also cost less per print.
It’s easy to make black and white printing sound difficult, and perhaps to get absolute control over the process it is, but with just a little trial and error it is easy to get decent prints using ABW, particularly if you are willing to print on Epson papers.


