12 bits Good

I’ve been wondering about noise and image quality and the differences between the various RAW settings available on the D800E (and D800). The most obvious differences are those of file size. With full-size FX images these are roughly as follows:

FX 14-bit lossless compression  40-48Mb
FX 14-bit lossy compression    34-38Mb
FX 12-bit lossless compression    28-34Mb
FX 12-bit lossy compression    24-32Mb

Actual file sizes using either form of compression depend on the subject, and any particular image will give a smaller file as you go down the list, with typically a 12-bit lossy file being a little over half the size of a 14-bit lossless one.

[It is possible to save files uncompressed, but doing so simply makes larger files that are slower to write and usually slower to load into processing software – hard to understand why Nikon provide the option and I assume it is a marketing decision – a useless feature that some reviewers would complain about if it was absent.]

So is there anything to gain from working with the larger file sizes? Opinions on-line vary, though as usual the most dogmatic are the least well-informed. But there are some whose opinion I normally respect who advise on choosing 14 bit rather than 12 bit, and I’ve been doing so for a while. But I’m no longer sure there is any point.

What changed my mine was reading a very detailed and rather mathematical paper, Noise, Dynamic Range and Bit Depth in Digital SLRs by Emil Martinec. It was written in 2008, over 5 years ago, but I think most of his conclusions are likely to still be true.

I can’t pretend to understand all of the maths, but I think I got the gist of it from the non-mathematical summaries. There are some rather surprising points made which perhaps go against the commonly held views on the subject.

At the time he concluded that “Twelve bits are perfectly adequate to record the image data without any loss of image quality” for the currently available cameras with just the Nikon D3 coming close to warranting the use of 13 bits. Any discernible difference would be because the slower reading of the sensor in 14 bit mode increases the accuracy of reading the values.

Things have moved on a little with current cameras, but I suspect that there is still little if any practical advantage in using 14 bit files.

Lower down on the same page, Martinec discusses the Nikon “lossy” NEF compression, coming to the conclusion that because of the noise unavoidably present in light, the compression actually results in no loss of visual information. If I understand what he says correctly, the loss is of the essentially random contribution of noise to the image rather than the true information present.

So I’ve decided there is little or no point in working in anything other than 12-bit “lossy” mode on either the D700 or D800E. Hard disks and large cards may be cheap, but it’s still worth cutting down on the space required, particularly with backups in mind.

There are also some other points of interest in the article, with a discussion about the ‘expose to the right’ rule and also on using high ISO.

Expose to the right is still a good rule, and “exposing to the right at the lowest possible ISO provides the highest image quality” but the reason usually advanced is wrong, and it is simply because this improves the signal to noise ratio.

As for high ISO, above a certain ISO you will get greater dynamic range by underexposing your raw files and correcting this in software.

I’m not sure how you decide at what ISO to start doing this, but on the D800E when working at night I’ve found in practice I get better results by sticking to ISO 3200 and underexposing. Its almost always necessary to underexpose at night by a stop or more in any case to get the effect of night.

But when working at low ISO’s I think he concludes that you should give correct exposure following the expose the the right rule for optimum quality.

There is more to the article than this (including some useful advice for camera makers) with a discussion of pixel size with a conclusion that will surprise some (it did me.)

But it isn’t easy going. A simpler article 12Bit Vs 14Bit Raw And Compressed Vs Uncompressed… Does It Matter? by freelance photographer Francois Malan has some real life examples that I think show fairly clearly there is little if any advantage in 14 bit over 12 bit on the Nikon D7000 (though there is a rather curious colour shift in the heavily underexposed examples.) His article was inspired by the more theoretical work of Martinec, to which he links.

Continue reading 12 bits Good

Adobe I Think Not

Like quite a few other photographers, I’m wondering whether to jump aboard Adobe’s licensing programme, which, for the next couple of days only – until Dec 2nd – is on offer for photographers at at $9.99 per month to include both Photoshop & Lightroom for those who don’t own a recent copy of Photoshop. Earlier Adobe had made the offer available only to those with Photoshop Creative Suite 3 (CS3) – and that offer continues until the end of 2013.

Given the fairly regular paid updates that both Lightroom and Photoshop have had in the past, this doesn’t seem a bad offer for those who need to keep up to date in both programs, but it does tie you in to a continuing commitment. Once you are on the licence scheme, the newer versions you get will stop working if you stop paying.

For those of us in the UK, Adobe’s offer is not quite as generous. Allowing for VAT, the offer should translate to around £7.50, but Adobe are asking for £8.78 a month, which adds up to £105.36 a year. It still doesn’t seem excessive, but the licensing programme ties you into a scheme in which Adobe have the upper hand and can (and surely will) increase the monthly subscription as they wish. Once you are in you have the choice of paying the increase or going back to the software you had before you joined, which could cause problems.

At the moment it looks as if Lightroom will continue to be made available for the foreseeable future as a paid for program with charges for major upgrades. Unlike Photoshop, which has been around so long that upgrades are seldom of huge significance (and sometimes make annoying minor changes that move or alter the familiar), every major upgrade to Lightroom so far has been worth buying (and the minor ones which come free have also been worth installing.)

Photoshop isn’t of course the only software for photographers, and many make do with alternatives, such as Adobe’s own Photoshop Elements, though its interface always puts me off. But there remain a few things for which Photoshop seems essential, notably for me its ability to produce CMYK files, and it remains an industry standard. For me it is also the easiest software to use for retouching my scans, and a reliable carrier for a number of Photoshop plugins I find useful (though other software would also support these.) Some people find Photoshop buggy, but I’ve seldom had any problems with it.

Were I to need to look for an alternative, perhaps the most suitable software would be Photoline, software which started on the Atari ST in 1996 and first came to Windows the following year in version 2. There is a useful Wikipedia article on it. Version 18 is now available for both Windows and Mac and has full colour management and Lab and CMYK support. I’ve not tried it (you can download a 30 day trial version) but it looks impressive. The full software costs 59€ and a single user licence allows you to install it on several computers (even both Mac and Windows.) Major version upgrades seem to come every year or two but cost only 29€. Currently the euro prices convert to around £49 and £24 respectively. If any readers are using Photoline, comments would be welcome.

Were it important to me to keep up-to-date with Photoshop I’d sign up today, but it isn’t, and I’ll save the money for the moment. If Adobe ever move to put Lightroom on a subscription only basis I’d have to reconsider, though perhaps too I’d look for alternatives. Adobe isn’t the only game around.

Lightroom Lens Profile Tip

I’ve just realised that I hid away a very useful tip in a rather long post the other day, one which its taken me rather a long time to realise. Which is:

With ultra wide-angle lenses, correcting distortion isn’t necessarily a good idea.

In particular, Lightroom’s default settings with the 10.5mm Nikon fisheye are quite unusable, and images taken at or near 16mm with the 16-35mm are often less pleasant.

The default profile with both lenses sets distortion correction to 100, but except in some special cases its best to set the default to 0.

Lightroom (and presumably ACR) lets you easily change the default. Here’s how to do it:

1. Go to the Lens Correction Panel, select the profile tab,
2. Make sure you have Enable Profile Corrections checked and the correct lens profile displayed.
3. Make the change you want – usually setting Distortion to zero.
4. Under the Enable Profile Correction line is the Setup, which will now be ‘Custom’.
5. Use the triangles to the right of ‘Custom’ to select ‘Save New Lens Profile Defaults.

The 10.5mm fisheye lens actually has very little distortion –  but it has a fisheye perspective (I think an equisolid angle projection), enabling it to have a pretty huge angle of view – around 180 degrees across the image diagonal and around 145 degrees horizontal. The profile assumes it ought to be rectilinear, and this really just isn’t possible for such a wide angle of view. Only about half the image is usable, and it simply negates the idea of using the lens.  You may occasionally want to use just a little distortion correction –  perhaps a value of 20 or 30, but generally its far better to leave it to zero. If you want at less ‘fishy’ result, try a plugin like Fisheye Hemi, which renders the verticals straight (though if the lens wasn’t level they will converge or diverge.) PT Lens will also ‘de-fish’ images but in a different manner which loses a little more of the image, or you could play with the free Hugin panoramic software. PTGui is rather more expensive and works very well too, giving a choice of projections and if you want to make panoramas is the software I’d recommend for that.

At 16mm the 16-35 has very noticeable barrel distortion. But it’s only really noticeable on buildings and similar subjects. But what we do get noticeably in any very wide angle rectilinear lens is a distortion that increases towards the edges and corners of the frame. It’s generally most noticeable in circular or spherical objects and you can easily see it by viewing a ball through the camera and moving the camera to put it in the centre and then the edges and corners of the frame. If you think of the circular object producing a circular ray of light that will look circular if it hits the sensor at right angles, but as you move it away from the centre of the image, the light ray is hitting the sensor at a more oblique angle, producing this ‘distortion’.

Barrel distortion actually makes this effect less obvious, stretching out the subject in the middle of the frame and compressing the edges. The 4% or so distortion the designers allowed in the Nikon is actually remarkably effective when applied to roughly spherical objects like heads, making them look more natural, and the little increase in size in the centre brings out that part of the image, making it seem closer – and the main subject of the picture is often fairly close to the centre.

It’s a distortion that I suspect Mr Nikon (or whoever designs their lenses) may well have deliberately allowed or even encouraged at the very wide end, knowing both that it would enhance many images, but also that because of its uniform nature it can easily be removed for subjects where accurate drawing becomes essential.

By the time the lens is at 21mm, distortion in the lens is generally pretty low, and at 24mm roughly zero, with a little pincushion distortion above that, seldom enough to be noticeable except in the most critical images.

Correction of distortion always comes with some loss of sharpness, though only generally noticeable at a pixel peeping level. It is seldom necessary to correct distortion for this lens, unless you are an architectural photographer, and for most of us the best default will be to set distortion to 0 and save this as the new default for the lens.

Improving Crappy Lenses

PetaPixel’s title Researchers Develop Method for Getting High-Quality Photos from Crappy Lenses is certainly more down to earth than the original High-Quality Computational Imaging Through Simple Lenses to which it refers, and unless you a more of a mathematician than me you will find parts of the latter hard going. But it is worth going to the original, if mainly for the short video and the roll-over images showing how well the method works.

I took one of the sample ‘before’ images from their simple lens into Photoshop and tried my best to improve it. With a couple of passes through my normal sharpening plug-in, FocalBlade I could make significant improvements to image sharpness (I have an old version of the plugin, and used first DeBlur Pro mode, then Selective Sharpen Pro) without gaining too much noise in smooth surfaces, but was very clearly left with considerable colour fringing when viewed at 1:1, and could think of no way to significantly reduce this in Photoshop. This is a problem that the researchers “novel cross-channel term ” is designed to resolve.

The paper seems to be another chapter in a story we have already seen beginning where lens designers can rely on software to minimise some lens defects. Many cameras already incorporate this, particularly for their jpeg images, which can be corrected for vignetting, distortion and chromatic aberrations, and ‘post’ software such as Lightroom can provide similar functions for interchangeable lenses, automatically if it has a lens profile. For most of us such profile corrections have become a part of our normal working practice, applied automatically by the software, both for cheap and expensive lenses.

It’s hard to know how much of a breakthrough the work of the team at British Columbia University is, particularly as the point spread functions they use differ at different subject distances. While this may not be too much of a problem with cheaper compact cameras (or phones) there may also be a problem in achieving the necessary computational power in these devices – though what looks like some pretty tricky maths to me may not be too difficult to a chip – who knows?

I’d certainly love to have simpler, lighter and cheaper lenses for the Nikon. Particularly with the lower back pain I’m suffering at the moment, lighter would be good! The 16-35mm f4 is a great lens, hard at times to believe how sharp it is (after a little help from Lightroom) but at around 680 g or 1.5 lbs it isn’t light hung on a camera body around the neck. And at around 5 inches long, plus a lens hood, with a 77mm filter, it is big.  Good though the performance is, it still improves in Lightroom, which does a great job of removing distortion, chromatic aberration and vignetting.

This doesn’t quite all come for free, as the distortion removal does inflict a slight crop around the edges of the image, particularly noticeable at 16mm. Sometimes too, 16mm images can look better with the distortion, as when corrected to pure rectilinear there is actually more stretching at those edges. Round objects are actually closer to round with the distortion, and at 16mm most images actually look more natural without distortion correction – by setting the slider in the Profile sub-panel to zero.  It would probably be a good idea to make this the default setting for this lens unless you are an architectural photographer. Correcting distortions isn’t always a good idea with wide angle lenses.

Lighter cheaper lenses don’t always mean poor quality. The Nikon 18-105 is a pretty snappy lens and a little under a pound in weight as well as smaller in very dimension than the 16-35. As Photozone remarks, it has rather high distortion and chromatic aberration, but again with a little help from Lightroom the results are generally hard to fault.  Around a quarter the price of the 16-35mm, the biggest difference from the professional lens is in build quality. I can’t remember if the current lens I’m using is my third or fourth, though I did drop one of them. The low price means that repairs are seldom economic.

Egypt – the Revolution continued

On 30 June there were mass protests in Egypt calling for President Morsi to go, with apparently a majority of Egyptians feeling he had betrayed the trust they put in him at his election. Egyptians in London joined in, several hundred going to the embassy for a noisy protest, and you can see my report and pictures in Morsi must go say Egyptian People.

Among them were many that I recognised from the protests in support of the Egyptian revolution, but it seemed clear to me that there were now more women in Muslim dress than at these previous events. I’m sure that there are Egyptians in London who support Morsi, but at least on this afternoon they were keeping a low profile. One man did come along, together with his wife in black with a baby buggy. I first noticed him talking to the police at the embassy door, then a few minutes later he stood and shouted from the edge of the protest, holding up pictures of the pro-Morsi protests.  I took a picture from where I was with the 18-105mm, then moved through the crowd rapidly towards him. People were shouting back, and by the time I reached him police were leading him away, telling him if he wanted to protest he should do so somewhere else for his own safety.  There were two rather smaller pro-Morsi protests by different groups at the embassy the following weekend, one of which ended abruptly when it was shouted down by people from the other, but I was busy with other issues, But perhaps he came back and joined in then.

It was a densely packed crowd, but a friendly one, with people readily making space for me when I indicated I wanted to move through to take pictures, and I was able to make my way to the centre of where things were happening with little problem. Once there, the most useful lenses were the ultra-wides, both the 16mm end of the 16-35 for a rectilinear view, and the fisheye view – around 140 degrees horizontal – of the 10.5mm, which, as usual I was using as a 16Mp DX lens on the Nikon D800E.

At times the ‘native’ view of this lens, which has a circular feeling, curving the msubject more as you move away from the centre of the image I think really adds to feeling of the crowd, but normally I work with this lens on the assumption that I will correct it to a different perspective. There are various ways you can do this, either using Lightroom’s own ‘lens corrections’, Photoshop and various plugins or other software. I find it best to choose one method and stick with it, keeping in mind the changes it will make when looking through the viewfinder, and my favourite is the ‘Fish-Eye Hemi’ plugin from Image Trends.  Working with this in mind, the huge benefit is that the centre edges of the view finder show exactly what the extent of your frame will be after processing, but you have to remember that you will lose material from each of the 4 corners.

Lightroom’s built-in lens correction is generally hopeless. It defaults to ‘100’ which produces a rectilinear image, but only a smallish rectangle – perhaps a quarter of the image area – is really usable, and most of the image you saw in the viewfinder is simply lost. It actually does rather better if you crop the result from landscape to portrait, as it keeps the mid-top and mid bottom frame edges, resulting in an image in portrait format with around half the original horizontal angle of view.  Sometimes a small value – perhaps 30 – can produce an interesting result, still with a pronounced curvature and also losing 10-15% of the horizontal field of view.

There is also other software that can be used to alter the perspective, including Photoshop itself, and plugins such as Panorama Tools and PTLens, as well as software designed to ‘de-fish’ images for panoramas including PtGui. I think these probably give better conversions to rectilinear than Lightroom but at the expense of a slower workflow.  It’s probably possible to do almost anything with Panorama Tools if you devote sufficient time and effort and become a real geek.

But none of the ways of processing the fisheye images – apart from the ‘Fish-Eye Hemi’ give me something I can really work with predictably when using the camera. If anything the results it gives are more like what I actually see when looking through the camera, as somehow I am less aware of the curvature. The mind somehow corrects much of the ‘distortion’  producing a more natural impression in a rather similar way to the filter. I often mention this filter, and I don’t get paid for doing so – it’s just something that seems unique and works. Everyone with a 10.5mm should try it.

It is generally fairly obvious whether I’ve used the 10.5mm image ‘neat’ or processed in Fish-Eye Hemi in the pictures  in Morsi must go say Egyptian People, but there is a simple way to tell if you are unsure. To apply the filter I first make corrections in Lightroom (particularly for chromatic aberration and fringing which are rather obvious with this lens) including any dodging and burning etc, then export a 16 bit copy to Photoshop to apply the filter. Lightroom renames the exported image, adding the suffix ‘-Edit’ to the filename. Browsers differ slightly, but right-clicking in mine gives an option ‘View image information’ which if chosen brings up a list with the current image name highlighted.
________________________________________________________

My London Diary : Buildings of London : River Lea/Lee Valley : London’s Industrial Heritage

All photographs on this and my other sites, unless otherwise stated are by Peter Marshall and are available for reproduction or can be bought as prints.

To order prints or reproduce images

________________________________________________________

Darkroom & Digital

I’m not sure how much the elaborate mark-ups by darkroom printer Pablo Inirio shown in Magnum and the Dying Art of Darkroom Printing on The Literate Lens blog will mean to even most photographers, and I think every darkroom printer evolved his or her own shorthand to remind them of the dances they performed when making a particular print from a particular negative. But they at least give some indication of the complexity of darkroom work to get the most from a negative, and why we sometimes got through many sheets of paper to achieve just the result we wanted.

But in a sense I don’t think these skills are dying, but have just been transferred to a new environment, because what lies behind them is still the ability to visualise what a print should look like. If anything this is even more important in front of the monitor than it is in the darkroom, and software has enhanced the possibilities there are for working with an image and given it more precision, allowing us greater control. Of course we can abuse this – and plenty do, as I think some of the images mentioned in my recent post Raw and Cooked do, but the same is true in the darkroom, and I can think of at least one photographer whose work for me is almost completely ruined by his insistence on heavy-handed lith printing of all of his work (its a technique that certainly suits a few images, but not one for general use.) And back when I started in photography, almost everyone printed their pictures very contrasty, with blocked shadows and empty whites. It sometimes worked, but most of the time it was just the fashion.

Making good digital prints, particularly in black and white isn’t easy, although the materials available to do so are now readily available. In the darkroom the choices are diminishing – Inirio mentions that he had to change to Ilford paper when Agfa closed, though at least I can reassure him that if Kodak stops making its stopbath – apparently one of his worries – it is pretty simple to produce your own to the same formula – and those from other manufacturers are in any case just as good. But for inkjet both materials and equipment are still being developed.

Usually now whenever I show black and white work I expect at least one photographer to come up to me and say how good it is to see there are still some people printing in the darkroom. I don’t always enlighten them, but normally they are very surprised when I tell them that they are looking at inkjet prints.  When I make a set of prints, I’ve often got prints I made years ago on Agfa or Ilford papers to compare them with; it’s rare indeed for me to prefer the darkroom print.

Back when I started seriously printing black and white on inkjet I had to import Jone Cone’s Piezography inks from the USA and dedicate a printer to them, and I could only make prints on matt papers – and had to frame them behind glass (or high grade perspex) to get the depth I wanted, although as matt prints they could be stunning – far better than I ever managed on matt silver papers, and really as good as the best platinum or platinum/palladium prints I made. Cone’s inksets have improved over the years (and for a while I moved up with them) and can now use the better glossy papers that have become available, and if I still made and sold many prints I’d still be using a dedicated black and white printer with one of his inksets. But the output using Epson’s ABW (Advanced Black and White) with  Ultrachrome K3 inks (or other similar systems) can be nearly as good – and good enough to rival the darkroom.

And of course the prints I’m making are still prints on fiber (or in the UK fibre) paper, just like those old darkroom prints. Like the silver-based papers they are baryta papers too, with the same “richness and depth” of good silver prints on modern papers. Even though the ABW prints contain some colour pigment they are likely to last as long or longer than the silver prints (and with the same printer, inks and paper I also make colour prints that will outlast any C-type.)

Of course many old processes still have their value and perhaps use.  The most beautiful black and white prints as objects that I’ve seen are carbon prints (and one or two I made weren’t bad.) Wet plate printed on albumen produced some exquisite work that has never been surpassed.  I don’t think there is quite any match either for the prints I made in the late 1970s on Record Rapid, before the toxic cadmium was removed from it. But I don’t retain any great nostalgia for the darkroom now I can do better outside.


Out with the Fujis

Bank holidays often rather pass me by. I’m not often working on them – there are seldom many protests taking place and I’ve gone off most of the events that are held on them. But sometimes we take advantage of my elder son being off work to go out on a walk together, especially if the weather forecast is decent – as it was for this year’s Early May bank holiday. The walks, planned by my wife and son, tend to be rather longer than I’d like, and although I like to take a few pictures, my usual camera bag is far too heavy, and this was another good opportunity to familiarise myself with the workings of the Fuji XPro1 and the Fuji XE1.

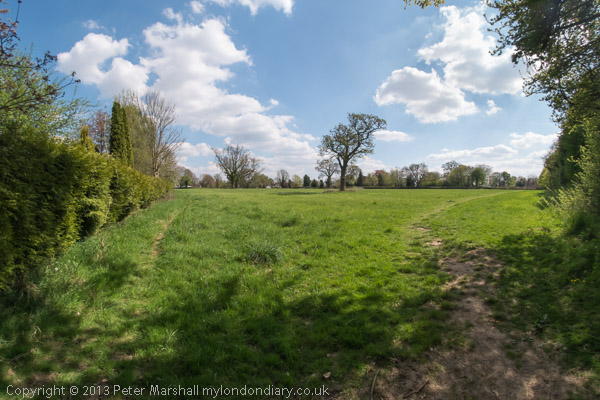
As usual I was working with raw files, and the settings that I have on Lightroom for importing files seem to me to give colour that is a little too saturated. The picture above was taken with the Fuji 18-55mm lens, and it seems pretty sharp, with very little noticeable distortion for a zoom except at the very widest focal length. This was taken at 25mm (38mm equiv) and looks more or less perfect in this respect.

Working in bright sun, I hadn’t meant to take this at ISO 3200, but given that the ISO was set at 800 and I had (by accident) and exposure correction of -2 stops dialled in, this is what it was. Image quality will have been degraded both by the high ISO, and also by the diffraction of the very small aperture that resulted of f22.  Looking at it on my screen at 1:1 – and examining portions of the almost 50 inch wide image that results on my rather smaller screen (the image is slightly cropped to 4796×3197 and my screen gives roughly 100 px per inch) there is a little noise visible, and a slight softness, but at normal print size the image is hard to fault technically.

So one problem that I have is that that exposure correction is far too easy to turn – this was on the XPro1, but the same is true of the XE1. You do get an indicator in the view, but I’m not very good at seeing such things.

But most of the time I was working with the XE1 with a Nikon adapter and the Nikon 10.5mm fisheye lens.  Its a little odd to use in that the lens at 305 g  weighs almost as much as the camera’s 350 g, and though it seems petite on a Nikon it seems pretty big here. The Nikon G adapter makes it stick out quite a long way more, and has a slider to control the aperture, needed as the lens has no aperture ring.  There are a lot of such adapters advertised on eBay, but those at reasonable prices seem to be of two actual makes, one with silver ridges on a black ring that changes the aperture. The example I bought of that doesn’t give infinity focus at the infinity setting on the 10.5mm, though it seems to work better with some other Nikon lenses. The other, with an all silver ring, works correctly with the 10.5mm.

Neither of them gives you any idea about the actual aperture in use, but you can get a rough idea from the change in the shutter speed. The 10.5 f2.8 works best around f5.6, two stops down, so if you get a shutter speed of 1/1000 indicated wide open, then stopping down until the shutter speed is around 1/250 will achieve this. Any lens used with the adapter of course becomes a manual lens , and the electronic viewfinder image gets dimmer as you stop down.

Once you have set the 10.5mm lens for both aperture and focus (normally at infinity) you seldom need to alter it thanks to the huge depth of field unless your subject is closer than a meter or two. If you set the focus on the camera to M then you can press the control on the back of the camera to zoom in to a highly magnified area of your picture when you do want to focus. As I found to my cost it is essential to check focus in this way; although the image in the viewfinder looked sharp I had it set wrongly for the first dozen or so pictures I took. It may not be easy to get images out of focus with this lens, but I managed it.

Processing is a bit of a pain, particularly as Lightroom 4 doesn’t offer automatic removal of chromatic aberration, which is a shame, as the 10.5mm needs some. You can improve the images by adjusting one of them, then syncing the settings across all of the the 10,5mm pictures – there doesn’t seem any real benefit from individual tweaking.

LR is so far a little of a disappointment for Fuji X users, although the latest version has improved the algorithm used for de-mosaicing the images. But I’m not entirely convinced with how it deals with the colour, and there are no Fuji-X lens profiles available. If I had time I could make my own, and there are profiles available on-line (using the Adobe Profile Downloader) for the 18, 35 and 60mm lenses, but not yet for the 18-55mm zoom.

There is of course a profile for the 10.5mm Nikon, though even when used on the Nikon I’m unsure there is any point in using it. Stupidly it attempts to correct the fisheye perspective to rectilinear as the ‘distortion’ element of the profile, which seldom if ever gives usable results. It isn’t ‘distortion’, but simply a different perspective, and the first thing I have to do is to set that ‘correction’ to zero.

Most of the images I want to run through the Image Trends Fisheye-Hemi plugin – which means exporting them as 16 bit TIFF files with the ProPhoto RGB profile. It adds to processing time and also eats up disk space, with the TIFF files being roughly 4 times the size of the RAW file, adding up to around 100Mb per file.

One of the fairly few non-Fuji lenses available for the Fuji-X cameras is a Samyang 8mm f2.8 fisheye, which also gives an image that fills the frame.  Although as you can see the Nikon does a decent job, I’m thinking about getting the Samyang.  You may wonder – as I did – why it is an 8mm rather than the 10.5, and the answer is that it uses a stereographic rather than an equal area projection (this may help.) The advantage of this is that objects near the edges are less compressed than with the Nikon and should look a little more normal – and with the shorter focal length if you use the Image Trends Fisheye-Hemi plugin you end up with a noticeable wider angle of view – something like 165 degrees horizontal, which may be an advantage. Fewer of the pixels are unused in the conversion which should result in higher quality in the corners of the image.

The Samyang is also a lighter and smaller lens, and has a proper aperture ring which will make it easier to use. As with the Nikon it is manual focus, but you seldom need to focus, and if you do for the occasional very close picture, need to use the magnified view possible in the electronic viewfinder.

I’m still not entirely happy with the Fuji cameras – though I think for most purposes the XE1 works better despite the electronic viewfinder being a poor substitute for a normal visual one. But at times coaxing the XPro1 to actually wake up and take a picture can just be too slow – normally it’s better to leave it switched off, as the start-up time is then faster! There is still something very wrong here, possibly something another firmware upgrade could cure if Fuji took photographers seriously.

Tomorrow’s Bank Holiday I’m still undecided about too. There are a couple of events I’d like to photograph, but it would be nice to go out for another family walk. So I might be using either Nikon or Fuji. Or since I’ve just been over-exerting myself in the garden – and found myself catching a very large holly branch as I pulled it down from the tree where it was held by other branches after sawing it off at the trunk – I may just need to rest with my feet up.

Too Much Control?

Perhaps there are good reasons why a photographer should sometimes want to limit the flash sync speed of their camera to – for example 1/60s – but I can’t for the moment think of a single one. Any suggestions are welcome.

Of course using slow shutter speeds with synch is at times a useful technique, but something quite different. There is no problem in using flash with a synch setting of 1/250 on an exposure of 30s – and the results would be identical to those with any other synch setting.

Back in the old days, slow sync speeds were often a problem when using flash, particularly once we moved away from flash bulbs to electronic flash. Back in the 1970s, the cameras I was using – Leica M and Olympus – had horizontal travel cloth shutter blinds in its focal plane shutter that could only manage 1/50 and 1/60 respectively. This slow X-sync speed was one of the limitations of the OM series (including the OM4 – my favourite 35mm film SLR – and I still own two, though it’s now probably ten years since I used them) despite its revolutionary (at the time) off the film through the lens flash metering which made flash so much more usable.

Cameras using vertical metal FP shutters had a shorter travel for the blinds and could also manage a faster movement, allowing higher flash sync speeds – often 1/125 in the 1980s, though at the expense of louder and more noticeable shutter noise.

The Nikon D700 (and D800E) offers flash sync in normal X-synch mode at up to 1/250, with special FP modes of 1/250 and 1/320. But custom setting e1 lets you select synch speeds – down to 1/60th. It shouldn’t be confused with CS e2, which sets flash shutter speeds from 1/60s to 30s, as the slowest shutter speed that will be used in P or A modes when using flash.

For normal use on my camera I set e1 at 1/320(FP) and e2 at 1/60. I can’t see any point in using a lower synch speed than the maximum, and I’d like to be able to set a faster slowest speed than Nikon allows to avoid blurring in some images rather than have to remember to do this manually. For most purposes we can simply forget sync speeds now, as these cameras will also synch at higher speeds using ‘Auto FP high speed sync” with the SB800 and other units that implement this though the manual seems very confusing on this. But it just works, even at silly fast speeds like 1/2000. So why have a custom setting at all?

The last few of times I’ve been out working, I’ve been unable to get fill flash to work with the D700, getting over-exposure all the time. It’s taken me quite a while to work out why, though the answer was simple and obvious once I took the time to sit down and think about it. But in the middle of a fast-changing situation you don’t have time to think, and it wasn’t obvious that things were going badly wrong on the kind of occasional quick glimpse at the images on the back of the camera.

When I got home, I’d take a few test images and find that the camera and flash were both performing perfectly, and forget about it. Fortunately it hadn’t been vital to use fill, and I’d got by without it. But this morning I decided I really had to sort it out.

My first thought was that it was a problem with the flash (and I’ve had a lot of problems with flash units, with two needing expensive repairs and a third being being beyond economic repair in the past year.) So I started by resetting all settings on that. I made a few test exposures indoors and things seemed to be fine, so then I went outside where the light was considerably brighter. And noticed that when I turned the flash on the shutter speed dropped right down to 1/60. I couldn’t understand why, nor why their was a ‘HI’ in the control panel – and then I realised.

Most of the time I’ve used flash in recent weeks, a shutter speed of 1/60 has been more or less what I might have chosen if I’d been making manual settings. Possibly 1/125 or even 1/250. But the camera was still set at a high ISO and I was now in pretty bright light – the kind of conditions where I might want to use fill.

I’m sure I didn’t deliberately choose to set 1/60 as my flash sync speed, but possibly did so by mistake, thinking I was setting CS e2. Or just perhaps a load of electrons ganged up on me and decided to change it behind my back. It’s something that often seems to happen when I use the computer, and modern cameras are just computers with a few analogue bits tacked on.

But  I do wonder if the choice of sync settings is one that is there simply because it is easy for Nikon to implement and adds yet another ‘feature’ – even though it makes the manual fatter and understanding and using the camera tougher – or is there really some point to it?

Photographing Vultures

© 2013, Peter Marshall
1/60 f4 ISO 1250 flash

Although I don’t much like working after dark, it can often add a little drama to images, and digital cameras work so much better than film in low light. As I’ve often mentioned, the really important thing for me about this is that it enables me to produce much better images with flash.

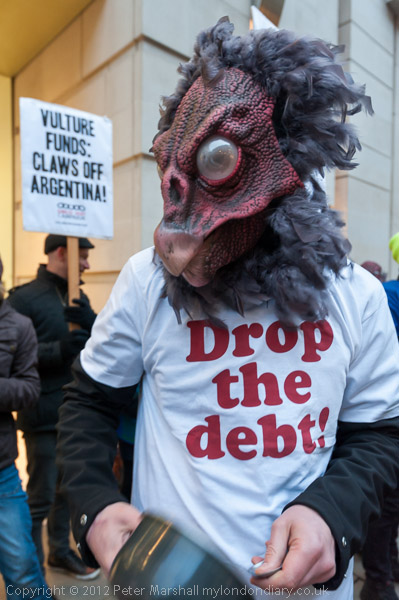
The protest against vulture funds – companies that have bought up bad debts run up in the past by failed regimes for a small fraction of the original load (in this case the Argentine junta) and pursue their successors in courts around the world for every last penny started as light was fading fast, and I took my first pictures as the protest was starting by available light.

© 2013, Peter Marshall
1/60 f4 ISO 1250 no flash

The light was rapidly fading, and soon most of the ambient was coming from street-lights and the windows of shops and offices, and was extremely varied in both quantity and quality.  Most of the pictures I took were using flash, and in the images in Vulture Funds – Claws off Argentina! there are some examples of both ‘good’ and ‘bad’ flash techniques. ‘Bad’ flash is sometimes all you have time to do, when you haven’t got time to do anything but grab the moment, and the obvious defects can sometimes produce interesting results.

© 2013, Peter Marshall

So while I dislike the obvious shadow of the placard, the over-lit face of the young girl holding it does make her stand out in a dramatic fashion. Taken with the lens at 18mm (27mm equivalent) she was pretty close to the camera, and was moving around pretty rapidly. My main aim in framing was to include the message of the placard – slightly truncated but it still gets over the message that the vultures should take out their claws – and also I’d been trying hard in other frames to get in the ‘drop the debt!’ message on a number of t-shirts worn by the protesters. But the walker at top right with shoe and saucepan (and the other saucepan) is an example of the little bit of luck we need and just occasionally get.

This was taken in a particularly dark bit of pavement at one edge of the protest, and was one of a series of around 50 pictures I’d made trying to get a strong image from these two kids, who were very playful but extremely uncooperative. I could have posed them – and another photographer did, but that would have lost the incredible energy that I saw. And I don’t do that sort of thing! People posing for me of their own accord I’m happy with.

Of course the picture from the camera didn’t quite look like this. Her face was very close and like the placard needed considerable burning down to give an effect like that I saw, while the young boy’s face was rather darker, and needed some dodging. Using flash often needs quite a lot of post-processing. One thing I missed when doing it on this image was the biscuit in the girl’s mouth, which could have done with rather more toning down.

© 2013, Peter Marshall

Another example of flash is this image of the vultures with pans holding the banner. I’d decided to work (as usual) from the side and needed a fairly high viewpoint to see the pans they were banging behind the banner. Flash was essential, but the nearest part of the image was perhaps a couple of feet away from my lens and the furthest perhaps ten or fifteen. Using the inverse square law, the difference in light from the flash would have been in the order of something like 25:1, perhaps 4 or 5 stops.

You can cut down the ratio simply by aiming the flash away to the right, swivelling the head on the SB800 around 45 degrees. I was using the built in diffuser and rather ineffective reflecting white plastic, which gives slightly more even lighting and there was still more than enough light at the left edge of the image. Using a high ISO 3200 also helped, giving a little fill from the street lighting, although most of the light around was actually from the windows behind. Because there was a lot of vigourous pan-bashing happening, I was working at a fairly fast shutter speed – 1/320 – and the results for this particular image would have been better had I thought to move to a slower speed. I’d simply forgotten to do so.

Again, a straight jpeg would have showed much more uneven lighting, and I’ve dodged and burnt to get the result I wanted, rather more like how the scene actually appeared than a completely straight result. I haven’t got it completely right, and the light is still rather uneven. The furthest parts of the image are also noticeably ‘noisier’ as a result of needing to be brightened in post, but the result is still usable.

One of the things I also found it that photographing vultures isn’t too easy. It was very easy to find angles from which vultures don’t really look too much like vultures. I’m rather more used to photographing people – and there are plenty of examples of that to, as well as more in the issue in Vulture Funds – Claws off Argentina!

________________________________________________________

My London Diary : Buildings of London : River Lea/Lee Valley : London’s Industrial Heritage

All photographs on this and my other sites, unless otherwise stated are by Peter Marshall and are available for reproduction or can be bought as prints.

To order prints or reproduce images

________________________________________________________

Flinging Cameras

© 2012, Peter Marshall

Above is the latest modification I’ve made to my D800E, with a short length of nylon pictures frame cord between the strap slot on the sling strap and the strap ring on the camera body.

It’s very much a stable-door modification after my run for the train on the way home on Saturday resulted in the camera detaching from the strap and bouncing along the platform. Fortunately the camera itself doesn’t appear damaged, as it landed on the flash unit. This broke quite neatly leaving the shoe in the camera and the body of the unit – which appears more or less undamaged skidding along the platform, from where another would-be passenger kindly returned it to me. It looks a fairly simple repair – and putting the two pieces together it still seems to work. The miniature flat cable from the shoe to the body actually looks like it was designed to unplug during this kind of event!

A colleague suggests that a little Loctite on the screw thread would be a good idea, and I don’t often want to remove the sling strap fitting (it takes a tripod screw on the rare occasions I need to use a tripod or monopod.)

I’d realised when I started using the sling strap that there was nothing to stop it coming loose, and added another to my repertoire of many nervous twitches, attempting to tighten it, but had never actually found it needed tightening. Saturday had been a fairly active day, moving around a lot when taking pictures and it had obviously worked loose, with running for the train the last straw.

The nylon picture frame cord is tough stuff – unlikely to break under the weight of camera and flash, leaving it hanging just a few inches lower if the strap becomes unscrewed again. I deliberately have left it loose both to allow the movement the sling strap needs and to avoid chafing.

I like to work with two cameras, and at the moment I have the D700 still on a normal neck strap and the D800E on a sling strap.  I quite like this, as it helps me to tell which camera is which (sometimes a problem for me, particularly as the telephoto lens I use is shorter than the wide-angle) and also helps prevent the banging of the cameras into each other which can result in minor damage.

I didn’t notice any problems working with the cord in place at a protest on Wednesday, so I think its a permanent feature on the camera for me, though I’ll need to watch out for wear.  So as I sat down on the bus to go home, I thought I’d mention it here and put the camera on my knees and took a picture of the modification – heavily cropped above. It was getting dark and it isn’t a high quality image, but it shows the idea clearly enough.

It also told me I had been working with the VR on the 28-105mm lens switched off. I can’t think why this should have been, probably just that I pushed the switch by accident when changing lenses. I don’t think I ever need to switch it off, and it has quite a heavy detent. I hadn’t noticed the images were any less sharp than usual.