Film Slides Away

The announcement by Kodak, reported by the BJP,  that they are to discontinue Kodak Professional Ektachrome E100G, Kodak Professional Ektachrome E100VS Film and Kodak Professional Elite Chrome Extra Color 100 means an end to their E6 colour film line, though the production of Portra, Ektar and other colour negative films and their black and white films will continue while demand keeps up.

On the Kodak UK shop site it states : ‘We estimate that, based on current sales pace, supplies … are expected to be available in the market for the next six to nine months; however, inventories may run out before then, depending on demand.‘ If some buy stocks of these materials to put in the fridge for later they may well run out faster, though this may not be a sensible idea. I’ve got stocks of various outdated photographic materials in a large cupboard here that I can’t quite bring myself to throw away, including over a thousand sheets of 8×10 colour and black and white papers. Perhaps one day I’ll feel like going in the darkroom again and it might just be usable, but I think both are unlikely.

Kodak were one of the pioneers of colour photography with their Kodachrome introduced in 1935 and discontinued in 2009. Ektachrome came out in the 1940s, at first with the E1 process. Later versions of the process, E4 and finally E6 became the standard colour negative process for virtually all manufacturers, and Kodak are continuing the production of E6 chemicals, though I always found their products highly over-priced compared with the competition, at least for low volume users.

Of course those who have a particular need for transparency film or are of a peculiarly masochistic bent can still buy and use slide film, something I largely abandoned in the mid-1980s. Fuji have been making better film than Kodak since then, and Kodak have only really been kept in the business by a curious consumer loyalty to the yellow box, perhaps fuelled in America by a kind of jingoistic protectionism that insists that US products are always the best. But then why is anyone still using film?

Doug Menuez tried to give a reason a few years back in a piece called The Zen of Film vs Digital Gratification. If like he apparently does you feel your work in digital somehow lacks lustre you might buy his argument, but I’m of the opinion that my work has improved with digital. But I almost never work in the way that he suggests photographers do with digital:

But while you have your head down checking the LCD guess what? You just missed your pulitzer. That LCD is crack. You just can’t get enough. We all want instant gratification and here you have it. Bliss. Yet the act of constantly checking the back of the camera is taking your head out of the game.”

I get far too involved in taking pictures to do much checking on the LCD while I’m busy taking them. I try to remember to occasionally take a quick peek to check I’m not really messing things up, but the first time I seem most of my pictures on the back of the camera is after I think I’ve finished the job. Often not until I’m sitting on a train on my way home. The main exception is when I’m photographing speakers at events, where  a single button press will zoom in on the eyes I’ve focussed on and let me check the person didn’t blink. There is a point in checking because most speakers are fairly repetitive in their gestures and you can usually re-make the image.

So I don’t share Menuez’s attitude to digital. It isn’t actually about the medium but about how he has chosen to use it. I welcome the new things it makes possible, but haven’t let it change me in the way he suggests.
Nokia 808 Pureview

Could my – or your – next camera be a phone? Certainly the Nokia 808 Pureview looks a fairly amazing piece of kit and the sample photos are impressive, certainly for a cameraphone. Of course we don’t need 41Mp, but by combining pixels to give 8Mp or 5Mp image output the Pureview is able to get better quality, as well of course giving it the ability to digitally zoom at decent quality. The zoom stops when the area of the sensor it covers has the number of pixels for the output.

So starting from 41Mp and reducing to 8Mp means going down to 8/41 of the sensor area, which I think gives a linear zoom of 2.26 (the square root of 41/8) while with a 5Mp image the corresponding zoom is 2.86, neither huge. The roughly 28mm equivalent f2.4 Carl Zeiss lens becomes a 28-63mm or  28-80mm respectively, which isn’t too bad, but the system really comes into its own with smaller image sizes. It will also have the slightly odd effect of quality being significantly better at the wider end of the range, and I imagine this will become pretty noticeable at higher ISO.

Of course 28mm for the 4:3 format (26mm for 16×9) isn’t particularly wide, and this is one reason why this won’t be my next camera. But it does seem to represent a real breakthrough in camera-phones, although it won’t be my next phone either, as I think it’s Symbian operating system is one to avoid, but perhaps with their next model it could really become the camera I’d take with me when I can’t be bothered to carry the real thing.

Candles at the Embassy

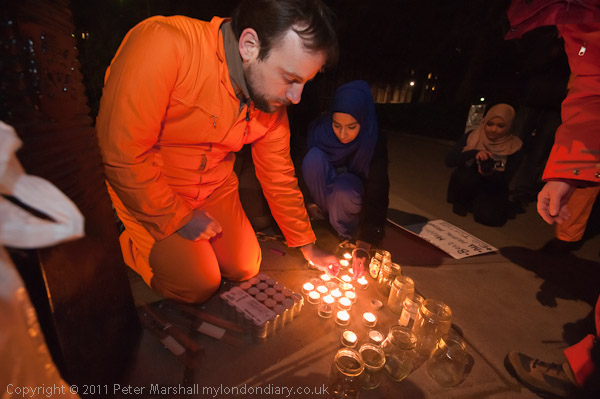
I suppose it’s the time of year, but I seem to have been spending rather a lot of my time taking pictures in the dark recently.  Although I work mainly in the centre of a major city, I find it surprising how stygian some parts of it can be.

© 2012, Peter Marshall
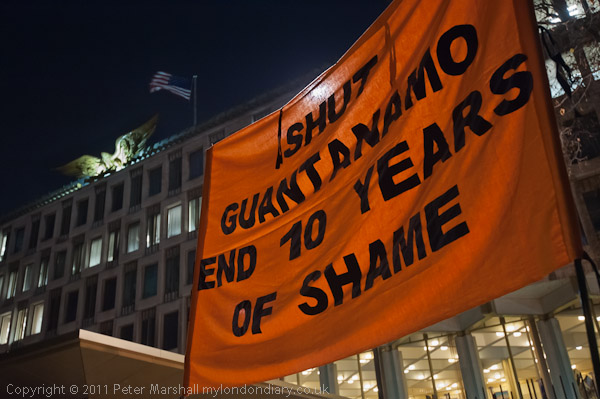
One of few pictures without flash: ISO3200 1/4s f4, hiding a spotlight behind the banner

The lighting along the west side of Grosvenor Square seems to rely mainly on the many windows along the rather formidable frontage of the US Embassy, and for some reason (surely not energy-saving from a country that seems rampantly denying climate change) most of those in the centre of the building were off.  It made me think that here was a building hiding its face in shame, as well it might over its treatment of detainees at Guantanamo.  There was lighting away from the centre of the building, and a little on the head of the eagle lowering on its roof, though the wings and flag rather faded into the darkness. A little burning and dodging was needed to bring them out in the picture above.

Photographically the situation was made worse as penetrating the general gloom were a few powerful spotlights. They didn’t seem to give a great deal of light anywhere, but could and did produce some nasty flare that ruined some of my pictures, as well as completely fooling the exposure system in my Nikons.  I generally use the matrix metering, which I thought was supposed to be able to cope with such things as backlit scenes and small light sources in the image, but experience shows it to be pretty hopeless, though it does work well with more normal situations.

© 2012, Peter Marshall
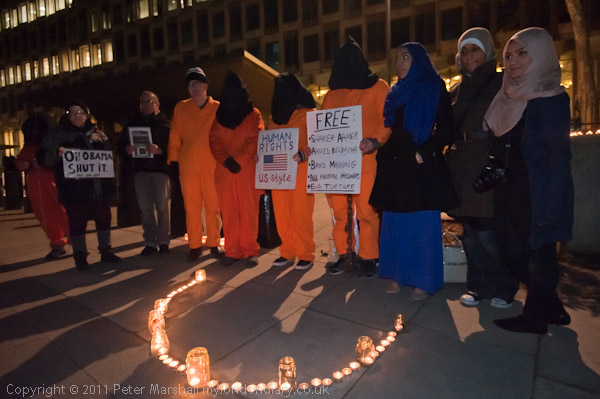
The heads and hoods only became visible with flash

Of course we now have cameras that give excellent results at ISOs that just a few years ago were almost totally unusable, so I was quite happy using the D700 at ISO 3200.  But there just wasn’t enough light even so to get decent pictures at shutter speeds suitable for hand-holding or photographing people who were not posing for pictures.

Had people been holding candles at chest level, there might have been enough light on their faces to give some pictures, but the candles were on the ground, and a group with well-illuminated knees doesn’t usually appeal. So for most of the pictures  I took I had to use flash.

© 2012, Peter Marshall
Lots of candles, but I still needed flash

It was an obvious decision, if one that goes against all the precepts of the available light school, those many articles I read over the years telling me how photographers destroy the atmosphere if they use flash.  And certainly you can, and many people have done and continue to do so, but I hope to do better. Too often I still see pictures with people caught like rabbits in the car headlights (Bill Brandt did it rather nicely in 1945 for Picture Post) which are seldom successful.

I set a high ISO – perhaps 3200 – and work with the camera on S – shutter preference auto – setting a speed which will probably produce a reasonably sharp result depending on the focal length and the amount of subject movement etc. Often a little blurring from gestures or people moving will add the the image. Typically this might be around 1/20 or 1/30s.  The exposure compensation is set to underexpose this by anything from 2/3 to around 2 stops, chimping until it looks around right. The flash is on its full auto flash fill setting, (TTL BL FP) and also set to something like -2/3 to -2 stops, again with a bit of fiddling if I have time. Probably I’m doing it all wrong, but it seems to work, so long as I don’t forget it will overexpose at closer than a couple of feet from the subject and I need to stop things down more.

The Nikon SB-800 flash I use does seem to be a little temperamental. Or perhaps it is the camera, once the two electronic systems are wedded together it’s hard to know which to blame. Every so often I seem to get a frame or a few frames that are hopelessly over-exposed. And recently when I’ve got the flash attached and on the camera it’s taken to emitting the occasional random flash when I’m not taking pictures. I sense an expensive repair coming on.

Text about the event and more pictures – almost all using flash – in London Guantánamo Campaign Candlelit Vigil on My London Diary.

________________________________________________________

My London Diary : Buildings of London : River Lea/Lee Valley : London’s Industrial Heritage

All photographs on this and my other sites, unless otherwise stated are by Peter Marshall and are available for reproduction or can be bought as prints.

To order prints or reproduce images

________________________________________________________

Snow Business

A couple of days ago the Daily Mash carried a feature  “‘UK braced for mediocre weather photography‘ SNOWY weather will result in a million of pictures of nothing much, experts have warned” and this morning I decided to play my part in making this prophecy come true.

It had looked pretty promising the night before as I walked home through the falling snow, making the Staines back streets look almost fairy-tale, at least with the benefit of the best part of a bottle of a rather fine Sauvignon Blanc inside me. I should get out and take some pictures I thought, but not for long as I reached a warm house, coffee and biscuits and bed.

So this morning, bright and early (not that early, but the only footprints other than ours from the night before on our local stretch of pavements were those of the neighbourhood fox) I donned long-johns and an extra pair of socks underneath my normal boots, bags and jacket and with two pairs of gloves and a woolly hat sweated my way around Staines.

© 2012, Peter Marshall
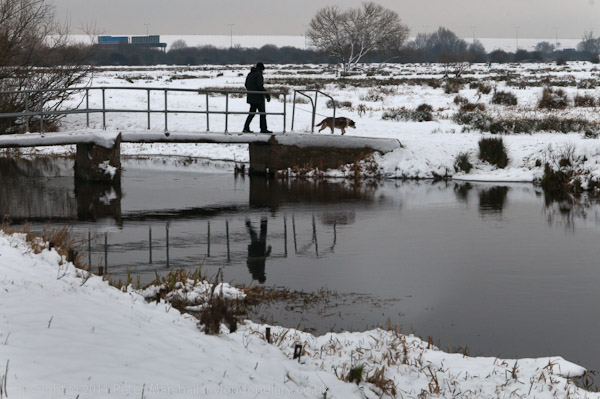
Bridge over River Colne, Staines Moor (D300, 70/105mm)

Staines unlike Rome, is built around seven rivers, or possibly more. The main one of these is of course the Colne, which reaches the Thames here, and the rest are (or were) bits of water from the Colne finding their own way into the Thames, and my route took me to the County Ditch and across the Wyradisbury River, the River Colne, Bonehead Ditch and Sweeps Ditch. We also have several rather mysterious streams that appear around Moor Lane and Yeoveney either from the Colne or old gravel workings and then disappear, doubtless into culverts, but the one I count as the seventh is an artificial ditch, the Staines Aqueduct, taking water from the Thames to various reservoirs.

© 2012, Peter Marshall
My bridge over Bonehead Ditch, Staines Moor (D700, 16mm)

So the Romans, who called Staines ‘Ad Pontes’ or ‘at the bridges’ knew what they were talking about, and my route included a number of them, including two on Staines Moor, one of which was natural rather than man-made.

© 2012, Peter Marshall
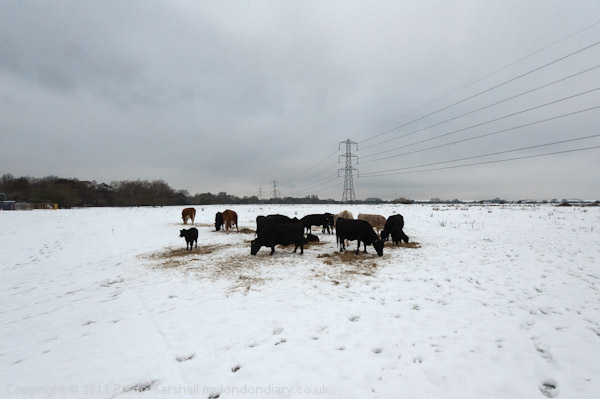
Animals feeding in snow on Staines Moor (D700, 17mm)

I’ll write more about Staines and my route in a day or two on My London Diary, but here I’ll concentrate on the photographic aspects. Digital makes photographing snow a lot easier, both in taking the pictures and in ‘developing’ them. Probably every photographer knows that cameras have exposure problems in snow, because exposure generally relies on scenes ‘averaging to grey’. Many of us back in the old days used to carry around a ‘gray card’ specially produced (and priced) with a neutral gray that reflected 18% of the incident light. When taking stuff on colour neg it was handy to put that in one corner of the image so you could balance using it when printing, and for getting the exposure spot-on you stuck it in your scene and took a light reading from it.

Nowadays I usually let the camera more or less work it out, though today for snow I set it to give an extra stop of exposure and then checked that the histogram looked more or less fine, going more or less all the way across to the right of the graph, but not past it. On many of the scenes I could have used two stops more and still been OK, but there would have been too great a chance of blocked highlights.

© 2012, Peter Marshall
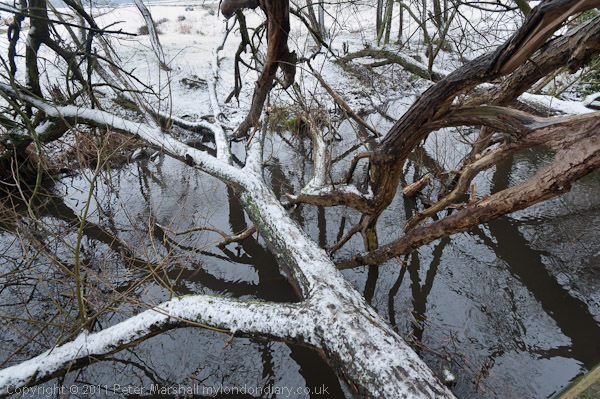
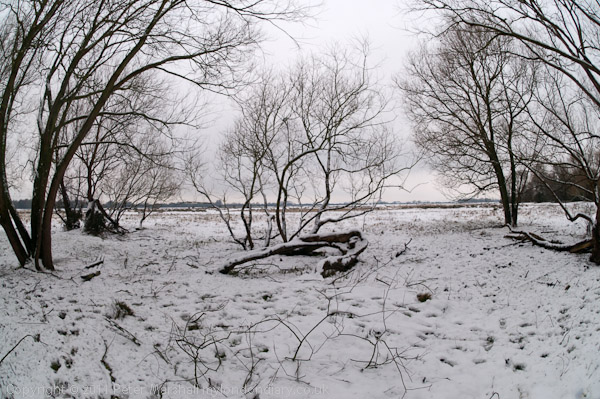
Part of circle of trees on Staines Moor (D300, 10.5mm)

In Lightroom, most of these images did need a positive tweak to the exposure to bring the brightest highlights right across the the right hand side of the histogram. Then I had to bring down the brightness to get the kind of texture I wanted for the snow. Apparently the next version of Lightroom won’t have the two controls, which leaves me wondering how I’m going to do that kind of thing – I think it will probably mean I’ll have to go back to working with the ‘Tone Curve’ as I used to with the previous Raw Shooter software. The slider that I’d actually like to get rid of is the ‘Recovery’ one, which I’ve learnt always to set at zero. Not that you don’t sometimes need to recover highlights, but that it is always best to do so on a local basis rather than the overall image degradation that the ‘Recovery’ slider provides.

My D300 is now severely in need of a service – or a replacement. I’ve been hoping for a while that Nikon would bring out a replacement either for the D300s or the D700 or both so I can retire it. Apart from the cracked plastic on the top-plate LCD which doen’t bother me, it now sometimes fails to return the mirror after an exposure, and simply stops working, which obviously does.

© 2012, Peter Marshall
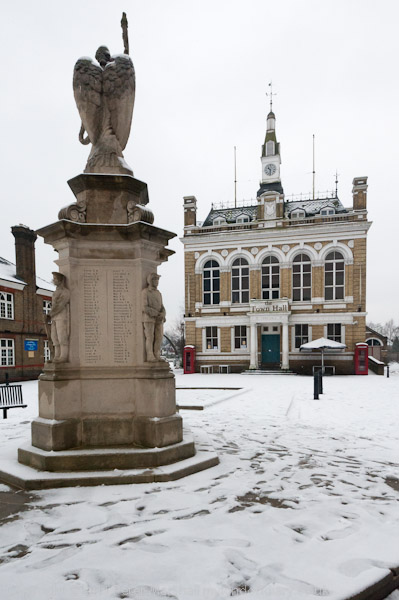
Staines Town Hall, sold by the local council for pennies and now a pub.(D700, 21mm, slight crop)

It happened for the first time a month or two back, and after a lot of cursing I found a way round. Use the menu and select to raise the mirror for cleaning, press OK and then the shutter release to ‘raise’ it (though it’s already raised), then switch off the camera and it comes down just as it should, and when you switch the camera back on it works properly again.

If it happens – as it has recently – perhaps once a day it’s annoying but not a problem. But this morning it did it at least a dozen times, which became rather a pain.

© 2012, Peter Marshall
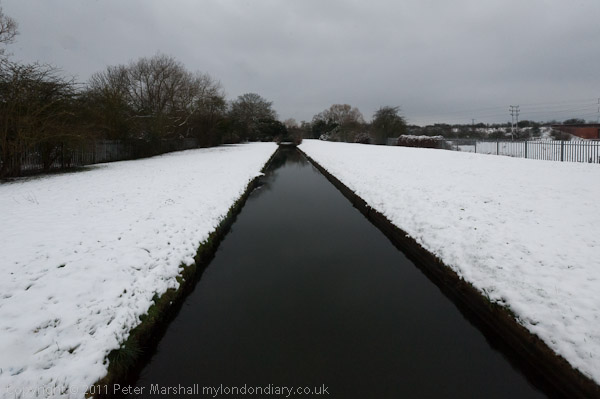
Staines Aqueduct which carries Thames water to the reservoirs. (D700, 16mm)

It’s also sometimes having problems focussing. A few times it did a bit of hunting rather than the usual fast focus. In the end I switched to manual focus, but by that time I was in any case working with the 10.5mm fisheye, where there is very seldom any need to focus at all.  The only problem with manual focus is that when you switch to manual there is virtually no resistance to turning the focus ring, and it is easy to knock it away from the infinity setting that normally works for virtually any distance.

More pictures and more about Staines on My London Diary shortly.

________________________________________________________

My London Diary : Buildings of London : River Lea/Lee Valley : London’s Industrial Heritage

All photographs on this and my other sites, unless otherwise stated are by Peter Marshall and are available for reproduction or can be bought as prints.

To order prints or reproduce images

________________________________________________________

Stereo With One Eye

One of several presents I gave my wife for Christmas was a book of old stereo views of London which came with a built-in viewer to see them. It wasn’t a great publication, though there were a few interesting pictures, it didn’t really give a very good overview of the city.

Back in Victorian times, no parlour was complete without a stereo viewer, usually wooden with two lenses to hold at your eyes and a slot the correct distance away to hold the stereo cards, which enabled you to view all the wonder of the world in your own home.

We passed the book around on Christmas afternoon and everybody had a look. Some people found it difficult to see the pictures in stereo, there is a slight knack to it and it gets much easier with a little practice. At least for most people it does, but there are some who just can’t do it, and my elder son is one of them. Born with a squint that was cured by an operation when he was small, although his sight is fine his two eyes just don’t work together.

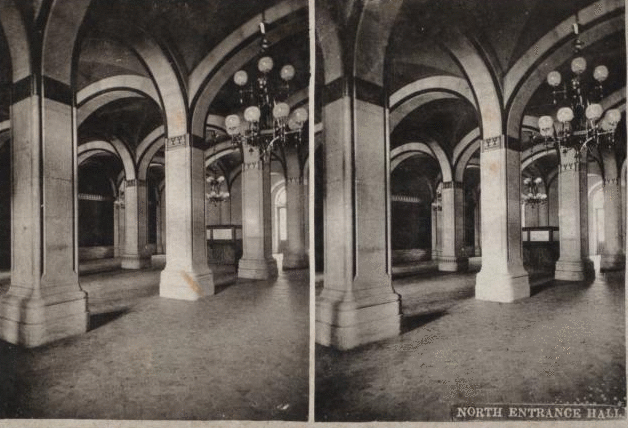
So I’ll be interested in how he gets on with the Stereogranimator from the New York Public Library, which they developed to let people look at around 40,000 stereo views from their collection, either as  “wiggle stereographs” or ‘anaglyphs’. Anaglyphs are the familiar two-colour views that you need special two colour glasses to view, but the ‘wiggles’ were new to me. They make seeing the images in stereo without glasses very easy, almost impossible not to see, by displaying the two images in the same frame as two images in an animated gif, wobbling rapidly between the two. It’s a bit annoying but definitely 3D.

GIF made with the NYPL Labs Stereogranimator - view more at http://stereo.nypl.org/gallery/index
GIF made with the NYPL Labs Stereogranimator

Of course if you have your red/cyan glasses handy it will look a lot better as an anaglyph – I just made this one on the NYPL site:

ANAGLYPH made with the NYPL Labs Stereogranimator - view more at http://stereo.nypl.org/gallery/index
ANAGLYPH made with the NYPL Labs Stereogranimator

Years ago I made some high quality anaglyphs using a pair of Olympus OM4 cameras joined together at the base by a short length of screw thread which fitted both tripod threads, letting you screw the two cameras, each fitted with a 50mm f1.8 lens into a nicely solid lump with the two lenses pointed in the same direction.  The lens centres were at roughly the same distance apart as my eyes which gives a nicely natural stereo effect.

The rig was completed with two cable releases tied together and the two plungers joined (I think I could have bought a double release, but that would have cost money) and it was possible to use handheld, taking pictures onto black and white film. The lack of the normal orange mask caused some problems when printing onto normal colour paper  (later Kodak produced an orange-masked black and white chromogenic film to make printing on colour paper easier, but what I needed were not neutral exposures, but a red and cyan exposure, one from each neg, made one after the other vaguely in register on one sheet of paper, adjusted so that where both where the same the print was roughly neutral. It took a little trial and error to get the best effect.

Thanks to PetaPixel for the information about the NYPL site, and there are a few good examples on their site, but you can go to the NYPL and select from their huge collection, or make a new one from their images as I did for the anaglyph.  It wouldn’t be too difficult to make some from your own pictures with Photoshop either – just take a couple of pictures from a short distance apart – perhaps 3 or 4 inches –  as  your starting point

OM Rebirth?

Almost 40 years ago, Olympus made a great leap forward in SLR camera design with the introduction of the OM-1 camera (initially they called it the M-1, but Leica didn’t like that and threatened to sue.)  It wasn’t a camera for everyone, with many pros complaining it was too small and too light to be serious, and certainly it didn’t have the tank-like qualities of some of the rival models. It was relatively small and light and came with a superbly bright viewfinder and a pretty decent set of lenses, some of which made the big guns look pretty sick.

The OM1 had its faults. It didn’t show the aperture in the viewfinder. Photographers used to having the shutter speed dial on top of the camera didn’t like the far better placement around the lens mount which meant you didn’t have to lose your grip on the camera to alter the shutter speed. It’s a shame it didn’t catch on.  Probably its weakest point was just a slight ‘iffiness’ at times about the shutter release, which could sometimes mean nothing happened when you pressed it the first time (something we are rather more used to when cameras have autofocus, but there was no reason for it in the manual days.)

By the time it had developed into the OM4 it was a real classic, and I had two of them together with a pretty comprehensive lens set in a very much smaller and lighter bag than I now need for the two Nikons. The OM4 had what was certainly the best metering system ever made for any film SLR, and was great for those who liked to think about exposure, allowing you to place an area on a particular zone with ease. Or you could just leave it on automatic, and it seemed to do better than the rather more complex electronic systems manage now.

Now Olympus are sending out teasers about a new OM series camera, the OM-D, supposedly a digital successor to the OM series. I think it has come around 10 years too late, but I hope I won’t be too disappointed.  You can read more about the likely spec at 43 Rumours.

I’m afraid the similarity will largely be cosmetic, an attempt to trade on the old reputation. Of course it won’t have anything like such a good viewfinder – it will be electronic. I suspect too that the dial we see a little of on the top plate is a shutter speed dial.

We already know more about another new camera, the Fuji  X-Pro1, also with a 16Mp sensor, though the slightly larger APS-C format, and one that promises to produce sharper images with a different sensor layout which cuts down the effect of moire. That looks rather more interesting as a camera, and is obviously aping Leica – just as the Fuji X-100 was. The X-Pro1 with its interchangeable lenses looks very much like the camera the Leica M9 should have been, so I’m waiting with rather more interest the first detailed reviews. So far the various ‘hands-on’ pieces although interesting really tell us only a little more than the press release.

But I’m already getting the feeling that this might just be the year I jump ship from Nikon to something smaller and lighter, at least for much of my work.

State of the Art B/W

I first came across the work of Jon Cone when he was making inks for Iris printers in the 1990s, although $150,000 price tag put me off using the system that he developed towards the end of that decade as ‘Digital Platinum’. When in 2000 he came out with his Piezography®BW software and inks for cheap desktop EPSON printers I immediately imported it from the USA and used it with an Epson 1160 fitted out with a continous inking system.

Prior to using it, I’d been reasonably happy with the colour prints I could make from this and other Epson printers using Epson’s own inks, but hadn’t felt that the black and white results were suitable for anything other than quick proofs.  Piezography was different, and I was (and still am) stunned by the subtlety of the results. In the 1980s and 90s I had worked with various methods of hand-coating to make photographic prints on watercolour papers, including kallitype, palladium and platinum prints. Now I could get the same qualities as these more or less at the push of a button, with perhaps just a little more richness and depth if I used some of the more expensive coated papers such Hahnemuhle’s German Etching (and later, Photorag.)

I was lucky to have few problems with Piezography inks, while some other users had frequent blockages of the printer heads. I’d recouped some of the costs by reviewing the system for the British Journal of Photography, so felt a little remorse when those who had taken up the inks on my recommendation had problems. Some were caused by a failure to properly close down the Epson printers, but I think there was also something of a matter of luck with Epson quality control. Good Epson printers parked their heads so they were sealed off, but Friday afternoon models didn’t and I think Epson had more than its share of Fridays.

The 1160 was a four ink printer, and Piezography replaced the cyan, magenta, yellow and black with a black and three shades of grey, as well as supplying a much improved printer driver (a Photoshop plugin) for black and white printing which used those grey tones to eliminate any visible “dottiness” in the prints, and I think improve detail. For ultimate results I think you needed to produce files at 720 dpi, while there was no point in going above 36o dpi with the normal Epson driver.

A couple of years later, Jon Cone produced some improved inks under the name Piezotone, and these were available in different grey tones. I went over to using the ‘warm neutral’ set, and when Cone was beta testing these for use with the Epson driver rather than proprietary software I was one of the beta testers. So prints made with my printer were pretty good, as the profiles had been fine-tuned to work with it.  Again some other users, thanks to Epson manufacturing tolerances, had slightly less good results.

Having been designed for my printer, the four ink Piezotones worked so well that I lost interest in the various improved systems being developed by Cone. Incredible though the K7 inks were, they would not work in my 4-ink hardware, and the gain in print quality seemed relatively small.

All my inkjet prints were matt, and I was quite happy with them. They had a quality that could not be matched on matt silver gelatin papers, which always had an inherent dullness to them, and matched that of the best non-silver prints (except for some carbon prints) but I still sometimes went into the darkroom when I wanted the different look of air-dried glossy silver gelatin, although once framed behind glass there was relatively little difference.

The next big change came with new fibre inkjet papers that promised to match fibre based glossy silver papers. Again I started printing on them with colour inks, using an Epson 2400, with great results.  Epson’s Ultrachrome K3 inks include 2 grays and a black, and can also produce pretty good black and white images using Epson’s own ABW (Advanced Black and White) option, which also adds a little coloured ink to make the tones neutral (or cool or warm as required.) ABW isn’t perfect, but usually produces better prints than I can in the darkroom, although some find their slight change in tone under different light  a problem.

I’ve also tried printing with the K3 inks without the colour inks using the Bowhaus RIP – and you can also do this with other RIPs including the Quad Tone RIP (QTR.)  Unfortunately this gives a slightly unattractive tone to the prints.

To get significantly better b/w prints (others have described those made using ABW as subtle and dramatic) I think I would need to invest in new hardware, at least if I want to keep the ability to make both black and white and colour prints, as 4 ink systems such as my two 1160s are no longer supported. The Piezotone inks I’m still very occasionally using (and are working long after their best-before date) are being discontinued in March 2012.

More interesting than my own experiences is Jon Cone’s The State of the State of the Arts in Black & White, in which he tells the story of his various ink developments, including  the “esoteric state of the art” system that he developed for Gregory Colbert‘s ‘Ashes and Diamonds‘ show, seen by more than ten million people.  The giant (8.5 x 14 ft) prints were produced by “a complex monochromatic methodology with twelve inks” using a Roland printer on Japanese hand-made paper sheets and each took 18 hours to print. Although this system isn’t one that could be marketed commercially, Cone used it as the starting point for his ‘Special Edition’ inks.

Even if you are not particularly interested in setting up to make your own fine black and white prints, the article is well worth reading for the insight that it does give into the work of some of those who have mastered digital printing, along with examples of their work. It comes too on a new website, ‘The Agnostic Print’ which has a number of other articles that look as if they will keep me busy reading for some time.

Lightroom 4 Beta

I’ve not downloaded the beta version of Lightroom 4 now available from Adobe, because I’m getting on pretty well with Lightroom 3.6 and I’d prefer to let others discover any problems – and hope that Adobe will sort them out by the time of the official release “in early 2012.” It does sound like they have made a number of significant improvements, particularly for me to the “basic tonal adjustment controls” which they claim “extract the entire dynamic range from cameras for stunning shadow details and highlights” as well as “additional local adjustment controls, including Noise Reduction, Moire and White Balance.

Some will also find the new abilities with video useful, though I’m still trying hard to avoid working with video; though I do recognise it has its uses, I find it rather frustrating and limiting, perhaps because I’m so used to thinking in terms of still images.

I don’t make a great many prints, though I have just started making the occasional one from Lightroom, and the new ability to ‘soft-proof’ should help, though I’ve never found it entirely satisfactory in Photoshop.

But if there are any photographers using digital out there who haven’t yet discovered what Lightroom can do for you, this is a good opportunity to work with the software for a decent length of time for free.  Photoshop is still useful, particularly for working with the scans I’m still making from film, but Lightroom does much more for my digital images, and does it much faster and more intuitively than Photoshop ever did.

Almost the only thing I still need Photoshop for when working with digital images are one or two plugins, particularly one I like for sorting out fisheye images. Lightroom can convert them to rectilinear perspective (which is very seldom what you want) or do a partial conversion which is generally more useful, but I often prefer the Fisheye Hemi conversion.

Lightroom takes a little getting used to, and I still find myself having to look at the help at times, but mostly I find it more intuitive than Photoshop. You can work on images with the local tools and not have to bother with layers. Lightroom stores your original files and doesn’t mess with them, and when you work with files you are creating lists of commands to be performed on the original. When you need actual files to be output, these commands are run and the resulting files produced, and you can set up presets with the file size, quality, profile etc you need for different purposes – full size high quality jpegs SdobeRGB to send to libraries, medium size sRGB files for projection, small sRGB jpegs for the web, with or without watermarks etc.

Presets are simple to understand and greatly cut down the time it takes to do what you need. They also make sure you get things right and don’t forget things. Much of what we have to do is repetitive and presets will do it for us.

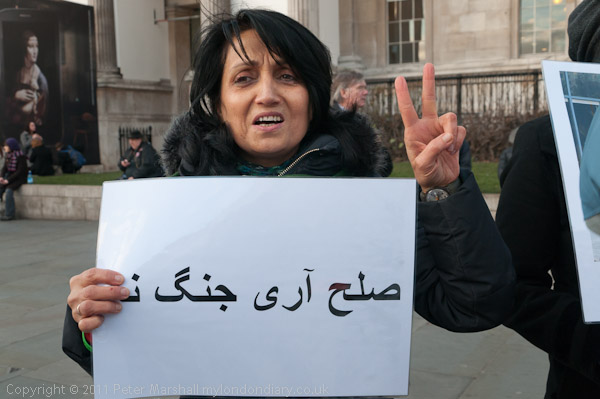
Lightroom works best for photographers who don’t mind getting their files organised.  So Lightroom automatically backs up my work as I bring it from card to computer, and automatically changes file names to give every image a unique name.  I think the best way to keep track of stuff is to use the date as the first part of every file name, so this image, taken last Saturday, gets a name that starts 20120107.

© 2012, Peter Marshall

Using the date ‘backwards’, yyyymmdd means that files will sort in proper order in any folder. Its full filename is 20120107-d0528 and the original RAW file has filetype .NEF while this version is a .jpg file.

Lightroom lets you store images in a systematic way – ordered by year, month and day – and then set up collections that order them in ways that make sense for you. So this particular image might be in a collection called ‘gestures’ and it could also be in another collection called ‘Iranian’ and another called ‘Trafalgar Square’ or whatever that represents how you want to classify images. You can also use keywords or any metadata to find groups of images.

And as you may be able to see, you can also put a watermark with the wrong year in it on your images. I did make a watermark file for 2012, but I’d changed back to the earlier one to write out some files from last November and had forgotten to change back.

There are some useful plugins for Lightroom, though these are different to Photoshop plugins. One cheap and useful one that I wouldn’t be without is Jeffrey Friedl’s Metadata Wrangler, strictly a ‘post-process filter’, a donation-ware program. And I’m pleased to read that this still works with Lightroom Beta 4, though it may cost a cent (or more if you wish) to upgrade.

Bikes Alive & Nikon Flash

© 2012, Peter Marshall

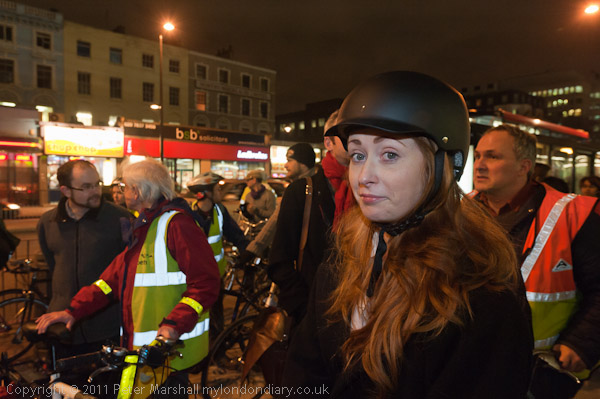
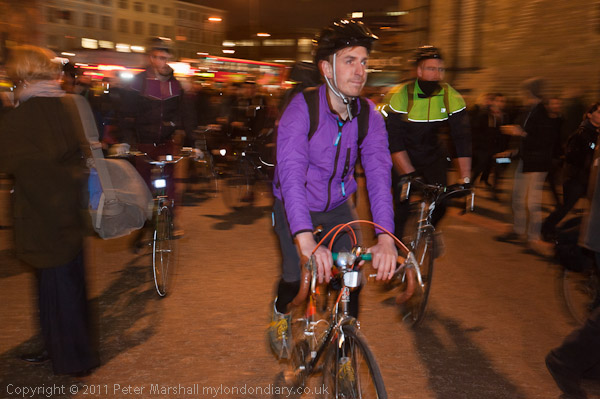
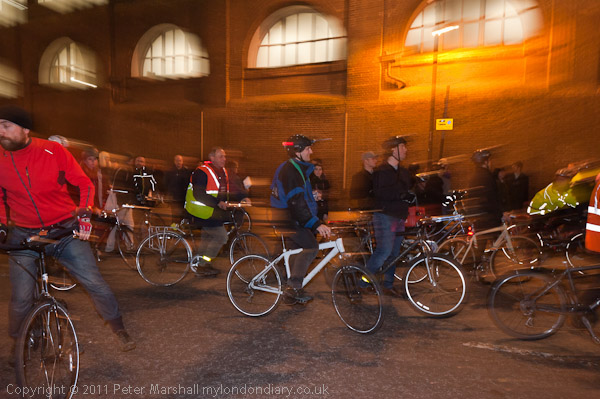
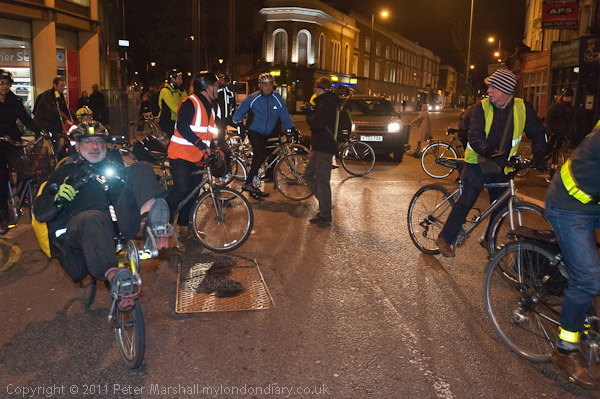
Or perhaps I should have called this things I should have remembered on Monday night with Nikon flash. Some of the results weren’t bad, but I could have done a lot better, and found myself much of the time pressing the shutter release with nothing happening, because the camera was failing to focus, and I couldn’t work out why the focus assist illuminator wasn’t working. Two minutes and a quick check of the manual when I got home and I was kicking myself.

© 2012, Peter Marshall

I’d set Custom setting a9 AF-assist illuminator to ON, but had forgotten that this only works when the focus mode is set to S (single-servo autofocus) AND you are either focussing on the central focus point or using Auto-Area AF.

Without the illuminator, focus with the 16-35mm in low light is pretty tricky as I found, and I have the camera set (CS a2) only to take pictures when in focus. So I spent a lot of time pushing the release and nothing happening.

The other slight problem was that I had taken a picture at the start of the evening using Aperture priority, and although I had changed the working aperture back to f4 (wide open) I had forgotten to change the exposure mode back to S. Which means that the camera was adjusting the shutter speed to some quite long values to get correct exposure (or rather the selected -1 stop exposure) from whatever ambient light there was.

© 2012, Peter Marshall

Generally it works better to set Shutter Priority, selecting the slowest speed that is suitable given the subject and ambient lighting. When you move into a darker area the flash to ambient ratio will change, giving a darker background, while the closer areas lit by the flash will stay more or less the same.

© 2012, Peter Marshall

You can read about the protest and see more pictures in Bikes Alive – End Killing Of Cyclists on My London Diary.
________________________________________________________

My London Diary : Buildings of London : River Lea/Lee Valley : London’s Industrial Heritage

All photographs on this and my other sites, unless otherwise stated are by Peter Marshall and are available for reproduction or can be bought as prints.

To order prints or licence to reproduce images

________________________________________________________

Hard Disk Data Rescue

As I write, I’m copying files from a hard disk in one of my dead computers across to my new machine. Probably most if not all of the images are somewhere on a backup CD or DVD, but it is rather handier to have them more easily available.

Unless you are a geek rather than (or as well as) a photographer, you may not know that it is usually easy to recover files from hard disks. Even if the computer refuses to boot from the disk it will probably still be working and if so almost certainly still contains most if not all of your files. Of course I knew that police or military intelligence or expensive data-recovery services could get you work back. And I thought I could probably fit the old disk into a new computer (so long as it had the right kind of connectors.) But what I hadn’t really realised was how easy and cheap it was to simply transfer the data.

The tiny bit of gear I bought is a ‘USB 2.0 to SATA Hard Drive Kit + Power Adapter‘ and cost me £12.95, and can transfer from 2.5″ and 3.5″ IDE and SATA drives to a USB port. It comes with various connectors and also a power supply with various connector types. Finding the right ones to get a power and data connection to the hard disk took a couple of minutes as I couldn’t be bothered to remove the drive from the system unit and it wasn’t easy to see inside the box, but other than that it was simple.

If I could be bothered to undo a few screws (and I may in time) I could simply remove the old drive from the machine and slot it into a ‘Smart Dock’ which cost just a few pounds more, and I may do so in time. I did wonder if this might be a sensible alternative to the growing line of external hard drives on the desk to my right, but at the moment it seems to be slightly cheaper to buy these in sensible capacities that bare hard drives.

Something that most photographers possibly know is that if police or security grab your camera and delete images or even format the card in your camera it doesn’t really remove your images. You should also know that they have no right to do so, or to ask you to do so in the UK, but unfortunately  too many don’t know the law or chose to ignore it. If you are a journalist (and a UK press card will evidence this) they don’t even have the right to look at the images without a court order. So long as you take no more pictures on the card, the files will still be there and can be recovered on your computer using rescue software such as Sandisk Rescue Pro.

There was a rather unexpected bonus to unplugging one of my hard drives. After I’d finishing copying a hundred GB or so from it I shut it down, unplugged the USB lead from the other computer and the power supply lead from the transformer and then thought I’d just try starting up the old machine again. After sitting there useless for around a month (my IT technician who had rebuilt it has been having other problems) it started up without the slightest hiccough, although as well as the drive I had removed, another is not yet accessible. If I can work out which it is I’ll try connecting that up with the . That still leaves two rather large working drives and gives me access to a lot more files without having to find off-line backups on DVD, CD or currently unconnected external drives.

It’s also the machine into which my film scanner is plugged, and assuming it keeps on working, it means I can return to the slow business of producing  high res scans my ancient negatives with the Minolta Multi-Pro.

________________________________________________________

My London Diary : Buildings of London : River Lea/Lee Valley : London’s Industrial Heritage

All photographs on this and my other sites, unless otherwise stated are by Peter Marshall and are available for reproduction or can be bought as prints.

To order prints or licence to reproduce images

________________________________________________________