I’ve been in Scotland for the past couple of weeks, visiting Glasgow and Iona, and missing much of what’s been happening both actually and in the media – though I did see a few seconds of the Olympics when I walked through a lounge on a ferry near Oban.
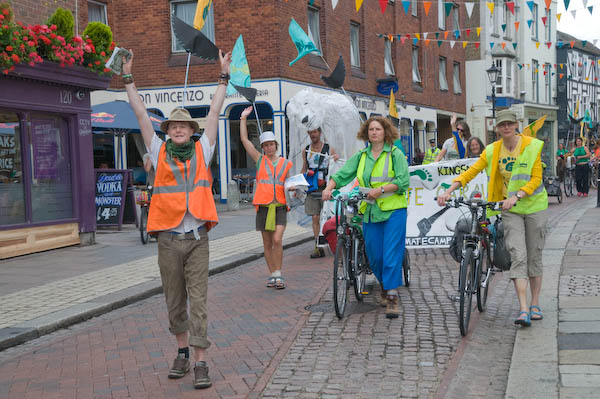
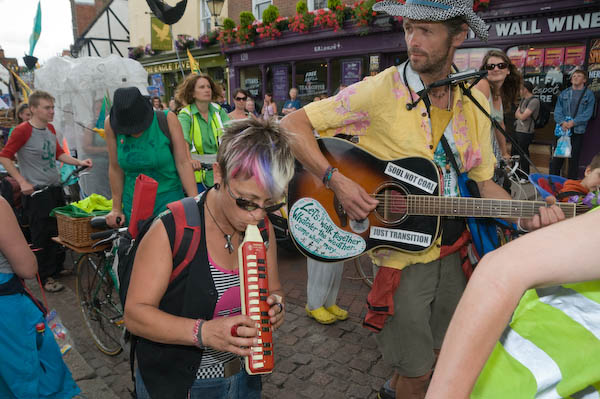
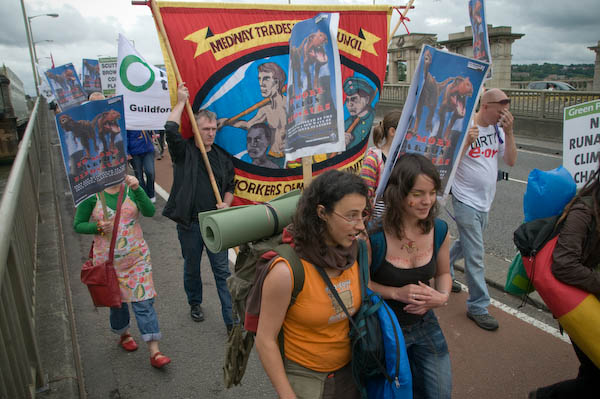
In a previous post I wrote about the rally at Rochester and the march to the Climate Camp at Kingsnorth in Kent on August 3, but I left the march after a couple of miles to come back, make that post, then pack for Scotland. The few press reports and radio news items I heard in the next week weren’t at all informative about what was actually happening at the camp, with no mention at all of the workshops, talks and other educational events taking place, and very little about the activities of the police.
In Rochester, the police were, so far as I could see, doing what they should do, having regard for the safety of the protesters on the march and allowing the rally and protest to proceed while also ensuring that those not involved in it could carry on with their activities with minimal disruption. While I was present, press and others photographing or reporting on the event were not impeded in any way.
Down the road and later in the week things appear to be very different, as you can see from the reports on various blogs. One of the best is Jason N Parkinson’s, with a number of reports including one with a video showing the police searching journalists – including Jason himself and Marc Vallée, who also has some powerful images. Although some situations might justify such searches, this would not appear to be one, and the length of time for which they were detained seems totally unjustifiable and the incident seems a clear attempt by police to restrict press freedom.
For the week, this part of Kent – the Hoo Peninsula – became a police state, apparently under Section 60 of the Criminal Justice Act, which police appear to interpret as giving them the power to do “anything they like” – including – as Marina Pepper describes, for male police officers to touch her in a way that in any other circumstances would have had her “pressing charges for sexual assault and expect justice to be done.” They also confiscated her grandmother’s table cloth as an offensive weapon and then lost it.
Section 60, intended by Parliament to give police powers to deal with football hooligans or others who might be ‘tooled up’ for trouble, should only be used where there is a reasonable belief by a senior police officer of incidents involving serious violence taking place. Few actual occasions where the police have used Section 60 orders would appear to meet this condition, and the intentions of the climate campers were largely if not entirely peaceable. Does trespass and the possibility of some damage through direct action qualify legally as ‘serious violence’? I would have hardly thought so, but then I’m not a lawyer.
Section 60 gives police the power to “stop any person or vehicle and make any search he thinks fit” whether or not he has any grounds for suspicion, and to seize articles which “he has reasonable grounds for suspecting to be an offensive weapon.” This means “anything made or adapted for use for causing injury to persons” or “intended by the person having it with him for such use by him or by some other person.” It seems highly unlikely that that there could ever be reasonable grounds for seizing a table cloth.
The police have often if not always pushed laws beyond what Parliament intended in defence of the status quo, often knowing that if and when things come to court there may be a fair trial and the case will then be thrown out or lost – as has happened frequently in recent years. Perhaps one day we will get a government that believes in freedom and attempts to rein in the force, but I’m not holding my breath.
As we have all seen, in China these things are simpler, and journalists covering the protests at the Olympics have been prevented from photographing, assaulted and in some cases detained, despite the promises of press freedom given by the authorities to obtain the Games. Among those assaulted was the Guardian’s Dan Chung, and his pictures as well as those of him being attacked are on the Guardian site along with a video of ITN News correspondent John Ray being taken away in a van. There is link to another video of the event on the PDN Pulse site.
Incidentally Ray says he was detained by the Chinese for about 30 minutes, ten minutes less than the photographers stopped in Hoo.