28 Seconds

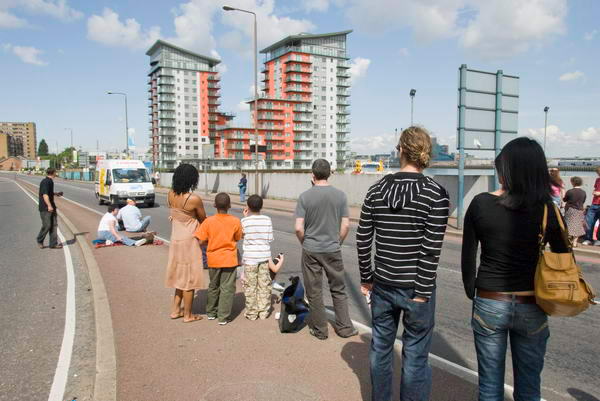
It took 28 seconds from my first view of the cyclists as they rounded the corner some distance down the road until the last of the 189 cyclists had passed me. Last Sunday, the Tour de France started in London, and I thought I shouldn’t entirely miss it. I decided Woolwich would be a good place, just a few miles down the road from the real start of the race in Greenwich.
(C) 2007, Peter Marshall
People had already started to gather along the route when I arrived an hour before the riders. Fortunately it was a fine day and many settled down at the roadside with the Sunday newspapers or a book as the occasional race vehicle drove past.

Finally, along came the pack of riders.

(C) 2007, Peter Marshall
I’m not a sports photographer, and hadn’t really though I’d take more than one or two pictures, but the excitement carried me away a little and I found I’d made around 30 shots – and for the first time ever had managed to fill the 21 shot buffer on the D200. Had I really been intending to take pictures I should have switched from raw to jpeg for the event, and I could have shot many more.

Normally the only time I ever run into buffer problems is when the card is nearly full. The camera won’t allocate more images than it thinks it has space to write to disk, so you can find the buffer will only hold a few images. It usually makes sense to put in a new card whenever you find there are less than 21 shots (the full buffer capacity) left.

Actually it gets a bit silly, as the current Nikon firmware doesn’t attempt to estimate the actual number of shots left if you are using compressed NEF. So it acts like there are only 21 left when in fact you will fit roughly double this number onto the card. It’s a problem that Nikon fixed on the D70 in a firmware upgrade, but which they have left on the later D200.

From the race I went back to the cycling festival in Hyde Park, where there was some more racing (and I took a few more snaps) as well as other related activities.

(C) 2007, Peter Marshall
More pictures coming on My London Dairy

Peter Marshall

Laburnum Street

Even if you’re a Londoner, you probably don’t know Laburnum Street. Haggerston has never been the most glamorous area of Hackney, itself on many measures one of the more deprived areas of the country. Even the artist-led regeneration that has brought Shoreditch, Hoxton, Bethnal Green and elsewhere back onto the map of London hasn’t quite got to Haggerston yet, although there are a few studios around in old industrial buildings.

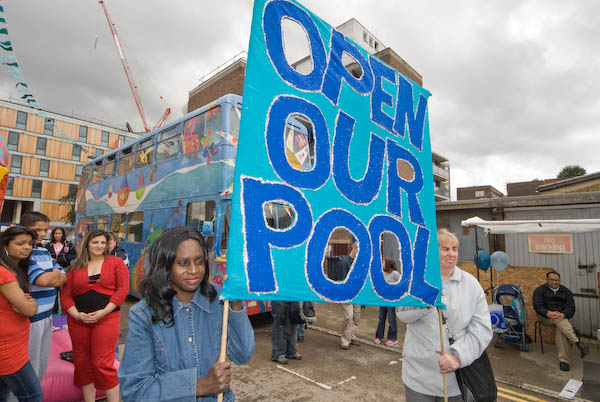
It’s an area with quite a lot going for it. Walking distance from the city. A canal, with an increasing number of desirable waterside properties being built. A new city academy rising. The large Suleymaniye Mosque on the corner. And plenty of other new developments not far away. But for the moment its most interesting features are the lively and very ethnically mixed people who live in the area, and (C) 2007, Peter Marshall, long neglected by Hackney Council, closed without notice in February 2000, and the subject of a lively local campaign to see it re-opened.

(C) 2007, Peter Marshall

The pool is a listed building, and English Heritage want it retained as a pool, as do the locals. Hackney Council have worked on feasibility studies which include a 25 metre pool together with other uses for the west side of the site, and the pool campaign have added their ideas to these proposals through a people’s consultation. The plans for the future are there, but not the £21 million to put them into practice.

(C) 2007, Peter Marshall
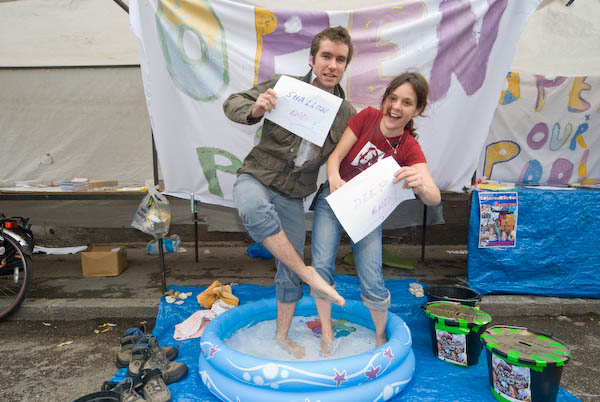
This was the only pool open for the street party

The first Laburnum Street Party was organised in 2004 to celebrate the 100th anniversary of the pool, and to raise the profile of the campaign for its re-opening. I went to photograph the third party in 2006, and was pleased to have one of my pictures used as the main image on the flyer, poster and programme for this year’s party.

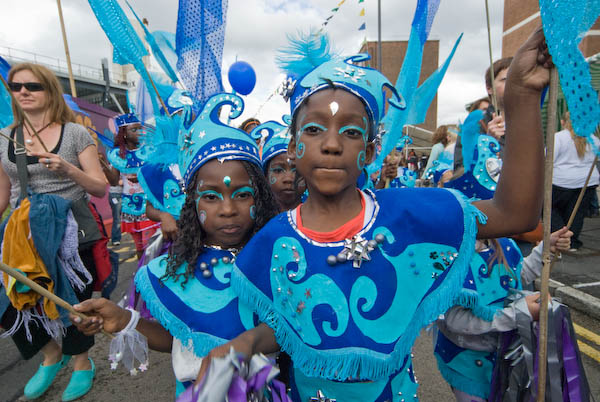
This year the event was bigger than ever, and attracted more sponsorship. There were around 75 street stalls of various types, including food, bric-a-brac and various informational stands. Two stages with performances of very different types and a childrens street parade, following workshops organised by Lucia Wey of Mush Arts, who I first met photographing the 2004 Shoreditch Parade. Free canal boat trips and various kids activities. So much going on that I could only photograph a small part of it, and was sorry to miss some of the acts I’d been looking forward to.

(C) 2007, Peter Marshall

Of course there were many other photographers there, as well as several film makers, including Dan Edelstyn whose hilarious film (with Hilary Powell) on the Olympics I mentioned here a week or so ago in More than the Olympics.

The weather was fairly kind to us, just a few minutes of heavy showers around lunchtime, and then some sun, and we made hay. Too soon it was time for me to go home.

More pictures from Laburnum Street Party 2007 on My London Diary shortly.

Banish those M8 Blues

Or rather more accurately, cyans.

At last, a simple method for removing the cyan corners that you get by using a UV cut filter on a non-Leica coded wideangle. I’ve so far tested it on an older 21mm Voigtlander f4. The other lens I’m currently using with a UV cut filter is an old Summicron 50mm, which gives little or no cyan effect because of its narrower field of view.

I’ve tested it only on Windows XP. However Panotools (Panorama Tools, the free programs and libraries originally written by German professor Helmut Dersch, which form the basis of some of the finest software for working with panoramas) is available for other platforms. Mac users might want to look at Kekus Lensfix CI – you can download a free trial version, and registration is $25.

For Windows you can download a free package with a convenient installer. Your first step, unless you already have PanoTools installed on your copy of Photoshop (Look under Filter menu for Panorama Tools if you are not sure) is to install it (if you have it already, start at point 3 below):

1. Go to Jim Watter’s PanoTools page, and d/l the PanoTools distribution, currently PanoTools12_2007Apr25.zip [Version: MinGW 2.8.6 Size: 894KB]
2. Extract the files to any folder, double-click on Setup.exe, then follow the prompts.
3. After installation is complete, start Photoshop, load one of your files with those nasty cyan corners.
3. Select Filter, Panorama Tools and chose PTCorrect
4. Check the Radial Luminance box, make usre all others are unchecked.
5. Click on options for Radial Luminance, enter 9 for red, click OK
6. Click OK to run the filter on the current file.
7. Check the cyan cast is gone and there is no red cast.
8. Smile and save your corrected file.

Before:
Before

After
After

Magic! And even just about visible on these small moderate quality jpegs, though the difference is much more impressive on the originals. One small warning. Leica users tend not to crop images (though even HC-B did on at least a couple of occasions.) But if you do, don’t crop until after you have removed the cyan cast!

Values of between 6 and 9 seems around correct for most images from my 21mm f4 Voigtlander. Wider lenses should need higher values, and longer lenses lower values. If you find the result now has a red cast in the corners, simply undo the filter and try again with a lower value. The cyan cast may depend on the aperture used, but unless you’ve gone back to using a paper notebook you probably won’t know that. However it does make the 21mm Voigtlander a very usable lens for colour images with the M8.

The next job is to record a suitable actions in Photoshop to run PTCorrect and assign it to a function key combo. I chose Ctrl+Shift F8. You need to ensure that the appropriate value is set for radial luminance and no other boxes are checked before you use the short cut, but it retains values until you alter them.

Then, from Lightroom (of course you can use any other raw converter – or even, if misguided enough, shoot in jpeg mode) after you have set the necessary development parameters (remember to judge colour on the centre of the image), you can define an export pre-set that both saves your file in its final destination and opens it in Photoshop.

Having used this for the first image in a set to be processed, Ctrl+Rt-Arrow takes you to the next image, Ctrl+Shift+Alt+E exports the file in the same way as the previous file, thus opening it in Photoshop, where your chosen function key combo does the business.

At this stage I do any other Photoshop work the image requires – if any, then simply close it, agreeing that I want to save it. It would almost certainly be possible to further automate this sequence, especially if you have later versions of Photoshop than me by putting a suitable droplet into Lightroom’s export actions, but I leave this as your homework exercise!

I don’t think it likely that Leica will ever make it easy for photographers to use non-Leica lenses, and although some people have managed to fool the M8 by painting dots on lenses, this is rather tricky. Unless the lens also selects the expected viewfinder frame it doesn’t seem to work either, and none of my non-Leica lenses seems to.

Mysteriously, the only lens I own that correctly records focal length in the M8 file EXIF data is an old 90mm, completely dot-free. There must be a reason for this, but I’m not that bothered. I can tell which lens I used even if the camera can’t.

For me, the M8 – like the other Leica M fit bodies I own (M2, Hexar and Minolta CLE) is a tool for taking pictures. I want to be able to fit a lens and take pictures. Any lens with the right mount. I use it because it is a beautifully simple and direct tool, that enables me to work in a very intuitive manner, and delivers great results. Or at least did on film. Getting the M8 to do what I want is proving harder, but PTCorrect is another considerable step in the right direction.

The New Panopticon

Photosynth from Microsoft Live Labs is amazing. Currently only available as a free technology preview, it gives a glimpse into a future that could completely re-draw our map of publishing and imaging and perhaps more.

If your system is up to it (Windows XP and Vista only, a fast web connection and decent graphics card), it only takes a few minutes to download and install this 5Mb ActiveX control, and although the preview is currently limited to supplied image collections, it does give some idea of the power of this technology in connecting images into truly “breathtaking multidimensional spaces with zoom and navigation features that outstrip all expectation.”

Microsoft acquired the technology by buying the Seattle company Seadragon in February. The team have also been working with the BBC for the series ‘How We Built Britain’. You can see some of the work from this country in the Your Britain in Pictures demonstration (which will also install the Photosynth control if it is not already present.) The Trafalgar Square collection is interesting as it includes archive images from the Royal Institute of British Architects and the National Media Museum, although it is perhaps a little short of images to show the full potential of the system.

You can get a better idea of its potential by watching its ‘architect’, Blaise Aguera y Arcas, demonstrating a more advanced version at TED (Technology, Entertainment, Design), a high-level annual conference sponsored by BMW, which also makes clearer some of the issues involved as well as demonstrating the incredible power of the application.

One image set was produced by searching photo-sharing site Flickr for images of Notre Dame in Paris, aggregating this incredibly disparate set of images (many typical tourist snaps) to produce a detailed highly-zoomable 3D model of the building, which also incorporates any captioning and keywording from the originals. As Blaise remarks at one point, their use of images has severe implications about copyright. Both the small print of photo-sharing sites and also proposed legislation on ‘orphan works’ are perhaps to some extent driven by the possibilities of software such as this.

At one point, Blaise throws the whole of an issue of ‘The Guardian’ on the screen, laid out page by page, then effortlessly scrolls and zooms around it, zooming at one point down to single character level to show the high resolution the system supports. Of course it needn’t just be a picture that already can provide rather superior quality to the printed version as well as being in some respects easier to browse; it would be simple to make it searchable text and to add text hotlinks to the existing image links.

This is a part of technology that can and will change the future of publishing – and lead to the end of print except as a niche fine-art medium. I think it will also change the whole economic and social structure of the industry. Probably not for the better, and almost certainly not for the benefit of those currently working in it.

Among many print journalists there still seems to be something of a head in the sand mentality. Citizen journalism, blogs, interactive web technologies and more are not going to go away. If we don’t learn more about the future we have no chance of influencing it.

At the moment, the Internet is still largely in the ‘Black and Decker’ age, where anyone can set up a site – like this one – and get their ideas out. A click of the mouse takes you from one site to another. Developments like this make the idea of huge and largely if not entirely isolated seamless commercial content conglomerations, rather more likely as the future.

Photosynth is also a glimpse of an Orwellian nightmare, linked to our increasing coverage of security cameras. This week a judge was acquitted in an indecent exposure trial because it could neither be proved nor disproved that he was the person involved. Had the CCTV images from the train been available they could have proved his innocence (or guilt), but apparently the British Transport Police had been too busy to collect them before the storage was overwritten.

The camera on the station, in the carriage, on the platform, the underground passage way, the street corner, in the bus, the workplace entry will doubtless soon all be wifi linked to network storage. Rather than tailing suspects, computers will recognise them by clothing and facial features, pulling out a collection from the giant image base, aggregating it with information from mobile phone locations and conversations. Little need for the house arrest that has got our government into trouble with the judges.

Modern technology enables us to spread Bentham’s Panopticon, with its control over minds by both the actual surveillance of individuals and the fear of the individual that they may be watched to the whole city. Photosynth and related software for handling and processing huge collections of data isn’t just going to revolutionise how we view and use images.

Peter Marshall

Leica Blues (or Purples)

I’ve delayed writing anything about the Leica M8 until now largely because I don’t yet feel I know enough about it yet. I started using one in April, but for various reasons haven’t taken a great deal – only a thousand or two shots.

Part of the reason for this was that I was still waiting to send off for my two free filters until I decided which sizes I wanted. Which lenses was I going to use with this camera from the ten or so M fitting lenses of various age and manufacture? When I finally got round to ordering them, Leica had made some of the decisions for me, as several of my older Leitz lenses take filters in sizes not on offer. Even some formerly popular sizes such as 40.5mm are not on the official list.

My favourite 35mm f1.4 for example would be a fine fast standard lens. Some versions of it don’t even focus beyond 3 meters on the M8, but mine fits fine and runs to infinity. But the lens has no filter thread. A cut-out lens hood holds a Leitz Series 7 unmounted filter. My lens hood is now incredibly battered, adding a certain street cred with the impression of having been through Kosovo or ‘Nam, but it isn’t easy to find filters to fit, and the severely crushed cut-out hood on its front has a nasty habit of falling off at awkward moments. More importantly, as Irakly Shanidze says in his excellent Leica M8. How is it for professional use? (in several ways the best and most balanced article I’ve seen about the camera,) just try going to your dealer and asking for a B+W 486 IR-Cut Series 7 filter.

Actually, a 49mm slim B+W 486 filter in black mount supposedly will fit in place of a Series 7, but you’ll need a particularly friendly dealer to order even one of these. Alternatively, I’m told if you contact Leitz, they may offer to make you a filter for the purpose. The B+W filters are a little stronger than the Leitz versions, but that isn’t likely to be a problem in practical use. (Heliopan also make some IR cut filters that differ slightly from the Leitz specifications, though none that will fit in place of the Series 7.)

IR cut filters have a problem with lenses with an angle of view greater than 60 degrees, as they give a cyan cast with more oblique rays, thus increasing towards the corner of the lens. The latest M8 firmware corrects for this by recognising the focal length of the lens from the 6 bit coding and applying a suitable correction. This is fine for coded lenses, but what if your lenses are not coded?

Some older lenses can be 6 bit coded, but not the older pre-ASPH 35mm f1.4. You can try the do-it-yourself method with a black permanent marker – although I’m assured it works, so far I’ve not met any success. Perhaps I’m using the wrong type of black pen?

However, painting on the coding dots is only half the solution, as the camera apparently only takes notice of these if the correct viewfinder frame is automatically selected. This rules out lenses such as my 28mm Minolta f2.8 produced for the Minolta CLE, the best 28mm design of its era, as this selects the 35mm finder frame. I’m told it can be engineered to select the correct frame, but I’m loath to take a file to mine.

However, although the IR problem can’t be solved in software, the filter-induced variable cyan cast should be possible to correct. It would be good to see a Photoshop plugin with a ‘focal length’ slider for this purpose, as with uncoded lenses it cannot be recorded in the EXIF data.

Leica users worldwide have been screaming at Leitz to allow user selection of focal lengths for non-coded lenses as at least a partial solution, but that isn’t the Leica way, which demands perfection, even where this creates extensive pain. Even those with Leica’s own latest lenses such as the wide Tri-Elmar have spent some time waiting on Leitz to come up with the correct filter.

Truly the situation is an unholy mess, and one that severely blots Leitz’s copybook. Their engineers apparently recognised the problem in the camera design stage, but seem to have simply hoped nobody would notice. What should have been announced as a novel and superior solution – along with a plentiful supply of filters for all current lenses and a wider program to deal with the many already owned by Leica users – was allowed to leak out, appearing as incomptence and even deceit.

This is a shame, as the Leica M8 is a great camera, for all our various niggles. It delivers superbly detailed 10 megapixel files from the finest range of standard and wideangle lenses available (including some great lenses from Cosina/Voigtlander and Zeiss.) Its simplicity is a strength – the menus are all simple and straightforward, perhaps the only digital camera you don’t need a manual to use. If as I did, you loved working with rangefinder cameras when using film, you would love an M8.

Peter Marshall

The ‘I’ Word

Archival Ink Prints

One of several things that impressed me at Photo-London last week was the number of inkjet prints on display, mainly in colour, but also some black and white, including what I thought was technically one of the best prints, if not the best, in the show (I don’t much like the subject matter, so perhaps won’t mention the photographer.)

Even more impressive was that none of the wall-labels for these prints mentioned the ‘I’ word. I*kj*t is certainly a taboo word so far as dealers are concerned. Instead there were various circumlocutions, varying from the entirely misleading ‘carbon print’ to things that were more essays than media descriptions, such as “printed with pigment based inks on archival cotton paper.” At least the term giclée seems largely to have gone out of fashion, though not entirely absent. It was probably never too popular in France, where I’m told the word, meaning ‘spurted’, has unsavoury slang associations.

Of course many inkjet prints are of poor quality and fugitive in nature, particularly in the early years of inkjet printing. The same problems beset photography in its early years, with salt prints and albumen prints often disappearing almost before your very eyes – and many watercolours also have fading problems. The rise of the photographic gallery in the 1970s and 80s more or less coincided with the so-called ‘new color’ photography, and many of those early C-types are now more a study in browns than colour images (although some at least of the dye transfer prints from the era retain their stunning quality – and there were some fine examples by Eggleston in particular at Photo-London.)

Dealers are also reluctant to use the term inkjet because everyone has an inkjet printer at home, just as many don’t like the term photograph, because the whole world takes and makes photos. Calling them ‘silver gelatin prints’ or even ‘color coupler prints’ associates them with the long and distinguished heritage of print-making rather than that common upstart photography.

Most of the descriptions of inkjet prints currently in use would surely fail under the Trade Descriptions Act as misleading. Carbon prints are something quite different, dating from the nineteenth century, which produced some of the richest and most lustrous images in existence (as well as many that were atrocious.) Of course many of those did not use carbon as pigment.

Archival is also a term lacking in definition. In terms of paper, cotton is a fine material for long-lasting papers, but probably the best lignin-free alpha-cellulose materials are probably its equal. All papers, including 100% cotton materials, may also contain optical brighteners (OBAs) whose fading will make papers yellow with age, and may also be coated with ink-receptive materials whose archival properties in such situations are undetermined.

Inks too are complex materials. Early inkjets all used soluble dyes, chosen with little thought as to their light stability, and prints faded fast. But there are dyes that are stable, that can most likely match the stability of the pigment inks we use. Not that pigments are always particularly stable, and carbon itself isn’t without problems. Of course even inks sold as carbon based inksets for black and white printing have turned out also to contain metallic pigments and often dyes as well (and there is good reason for their presence.) Inks also contain other materials which may too contribute to their fading.

It perhaps isn’t surprising that Stephen Livick, a photographer who seriously studied the problems of making long-lasting inkjet prints and published his personal test results received “serious litigious threats” which eventually forced him to remove his test information from the website. You can still read some of his conclusions, including the fact that certain coatings, particularly Clearstar’s Clearshield, applied after printing will greatly increase print longevity.

Of course, however prints are made, it is largely storage and display conditions that will determine the rate of their deterioration. Most prints would do pretty well if kept in an inert atmosphere at low temperature and controlled humidity – even silver negatives will keep for a considerable age under these conditions. Mounting on acid-free or impermeable supports (and of course any adhesive material used), framing under glass etc all will affect the rate of fade.

Although inkjet printing covers a wide range of materials (and some differences in method) I think we need a commonly agreed simple term intended to describe such prints rather than the current attempts at obfuscation. I don’t like the term archival, but it is hard to think of a better word, so I think we are stuck with it. Otherwise I think it best to keep the description as short and simple as possible. So I propose the term:

Archival ink print.

It is short, avoids the ‘I’ word (and the ‘P’ word), makes it clear that the image is an ink image, while avoiding much confusion. Of course many photographers will want to give a more detailed description of their working practices, perhaps as a part of a ‘Certificate of Authenticity’ which may also include advice on storage or display (such as “should be displayed framed behind glass out of direct sunlight.”)

This is a subject that has been discussed in various on-line forums over the years, and I’ve taken part in those often heated debates. My views as I’ve thought (and learnt) more about the problem have changed. So for me at least, this is a new suggestion. Your views are welcome.

Peter Marshall

Lightroom in Perspective

Requirements
One of several things that I kept putting off in my previous incarnation at About Photography was a review of Adobe Photoshop Lightroom. I kept away from the betas that came out over around a year because although it looked interesting, my hardware wasn’t up for it. But when I heard the release date, Linda got my six-year-old PC and I got a new big black box with a reasonably fast processer and decent amounts of memory and storage to run Lightroom 1.0. (I instantly forgot such figures, but since some people like to know, Control panel tells me Intel Core2 6400 (2.14GHz), 2.93 GB, and ‘My Computer’ shows I started with 1395 GB of disk space.)

The second thing you need to make the most of Lightroom (hereafter ‘LR’) is a big monitor. If you want to print color it also makes sense to get a good monitor, and I chose an Eizo ColorEdge CE210W. Running at 1680×1050 pixels in 32 bit color it does a very nice job of displaying 1.5:1 aspect ratio images at 18″ wide – including both digital and scans from 35mm. Carefully adjusted with the supplied ColorNavigator CE software and an Eye-One Display 2 it has greatly improved my colour printing too – and the Display 2 can also calibrate all my other monitors. I’d certainly recommend a wide-screen monitor for use with LR – the program fits on better than on a normal ratio. I’ve not tried running it on dual monitors which might well be an even better solution.

Disillusion Sets In?
LR isn’t perfect – after all it is still in version 1.0 – and I’ve read on the web of various people becoming fed up and abandoning it. In several cases the problems that caused them to give up could have been solved by learning a little more about the software, and others certainly come from trying to run it on underpowered systems.

Improved Workflow
LR aims to look after most of your images from camera to end use, and for me it does a pretty good job. The tools for extracting from RAW are a real step up from those in Photoshop CS2, and are now up with the best available, although there are a few features that still need improvement (I was among many who cursed when they bought up the superior Pixmantec, but the free copy of Lightroom has now made me feel a lot better.) Of course there are still some images that need the more selective approach that Photoshop can provide, through appropriate selection or masking before applying effects, or indeed sometimes by combining areas of two different outputs from the same RAW file.

One of the strengths of LR for me is that it allows me to keep the old filing structures I’ve set up over the years to serve my purposes (with some very minor changes.) One of the reasons other people have given for abandoning it is that it doesn’t! Both statements could be true, but I suspect not. It took a lot of persistent fiddling to find out how to do it, and had I written a review after a short acquaintance I would probably have got it wrong.

Another is that it simplifies workflow and cuts down time. It automatically makes the initial backups I need. During the import I use a basic preset I’ve specified that applies a standard tone curve, a minimal amount of sharpening, performs an ‘auto tone’, a minimal amount of luminance noise reduction, rather more colour noise reduction and various other minor tweaks. For each group of images I import, it adds the basic keywords I specify, along with my standard name, contact and copyright information.

Chromatic Aberration
Recently, particularly thanks to Nikon’s 18-200mm VR lens, I’ve discovered chromatic aberration with a vengeance (the 10.5mm also has a nice amount too.) There is really very little on the other main lens I use, the 12-24mm Sigma. LR provides a simple pair of sliders that can largely remove it. I do wonder if this could be largely automated in the same kind of way that PTLens (winner of my best value award for Photoshop plugins) does for lens distortion.

Speed
As my initial paragraph suggested, LR needs a reasonably specified computer. I haven’t tried to install it on my notebook, and won’t. I’m currently working with a library of almost 50,000 pictures (and growing fast.) It does take the software some time to finish loading, although it comes up on screen almost immediately. It’s best to switch the computer and monitor on, start the software and do something else for a while – and it also gives the monitor time to become stable. Once it has finished all the things it does in the background, the software seems reasonably responsive on my system – and seldom keeps me waiting. I’m very impressed by the speed at which it writes out a set of a hundred or so files. With other software I used to do this as a background task, but with LR it hardly seems worth the CTrl+Alt+Shift+E keystroke needed after each and I usually just run the task at the end while I take a short breather.

Gripes? Of course.

  • Importing files: So far I’ve found no way to automatically get LR to assign consecutively increasing numbers to files from different cards in the same directory. I have to look at the last file imported, add one and enter this into the start number box.
  • Templates: Some templates can’t be edited or even deleted (except by going to the appropriate folder using ‘My Computer’.)
  • Sharpening: This isn’t great, but then I don’t sharpen much – the libraries I send files to say not too. When I do sharpen for my own use I use the Focalblade plugin appropriately set for the particular output, rather than Photoshop’s rather less useful tools.
  • Noise Reduction: Again doesn’t match that of the better Photoshop plugins, though gives a basic adequate effect on most of my files.
  • Crashes and Hangs: This is version 1.0, and yes, it does from time to time. Usually it requires actually using Task Manager to end the LR process rather than the application. The good news is that so far, LR has then started up again without problems, and I’ve never lost any image files, nor even edit information other than about the file I was working on.
  • Lens Distortion: One of LR’s biggest missing features for me is a tool for removing lens distortion (again, the Sigma is fine, but the Nikon 18-200 needs help.) It would be nice to see this made largely automatic along the lines of PTLens mentioned above.

Still No Review
I still don’t feel I know LR well enough to write a review (though some hacks do it from the press release.) After all I’ve only been using it 3 months, and have hardly looked at the Slideshow, Print and Web modules. But I’ve said from the start, this is something worth buying and worth spending time and trouble to get to know.

Lightroom 1.1
It’s good to hear that this free upgrade will be arriving before too long (Adobe are still coy on the date), including some fixes for a few of the problems above. According to reports on the preview (see for example in the comments on Scott Kelby’s Photoshop Insider blog – reposted well down the thread after details mysteriously disappeared in the item itself) here’s what we can expect:

  • Lots of bug fixes, so it should crash less (and perhaps speed up a little;)
  • It will apparently let you edit and delete metadata templates;
  • Better ordering of templates;
  • Support for exporting and importing (merging) libraries;
  • Improved unsharp masking for sharpening, with controls for amount, radius etc.
  • A ‘Clarity’ slider that increases local contrast using high radius low amount unsharp masking.
  • A Spraypaint tool that lets you copy settings of various types – keywords, flags, develop settings, crop/rotation etc – to groups of images (replacing the Keyword Stamper.)

I suspect this will be the last free upgrade and the next (except perhaps for some bug fixes) will be chargeable, perhaps early next year. However if you’ve bought a book on using Lightroom, you may well want to upgrade that as well, as the changes are considerable.

Peter Marshall

Wrenovated

Linda was on a sponsored walk for Christian Aid around City of London churches on Sunday, most of which told the same story. Burnt in the great fire, rebuilt by Wren, bombed by the Luftwaffe and rebuilt more or less as Wren had intended. Only one church had instead been rebuilt in a modern style, and the results were not encouraging. I’ve long felt we should have planning laws that insisted that old buildings should only be replaced if the architects can convince a suitably qualified panel of planners that the new building is in every way better, but Wren would certainly be a hard act to follow.

I went along to keep her company and took the Nikon. Here are two pictures of a favourite corner of London, taken within a few seconds of each other. This one used my 12-24mm at its widest setting:

It’s ok, but somehow didn’t get the feeling of an enclosed garden that I wanted. So out came my favourite lens, the 10.5 fisheye, and well, you know what that does. To the rescue came Image Trends Inc, and the Hemi-Fisheye filter I reviewed not long ago. I think it does the job better.

City Garden (C) 2007, Peter Marshall

Peter Marshall