Today I’d doing some serous scanning despite it being a lovely day to go out and perhaps take some pictures. But I’ve a busy few days over the weekend and don’t want to get tired before this. I’m trying hard to finish a whole month of black and white work – July 1986. The pictures here are just a small sample from those I took that month, all in London.
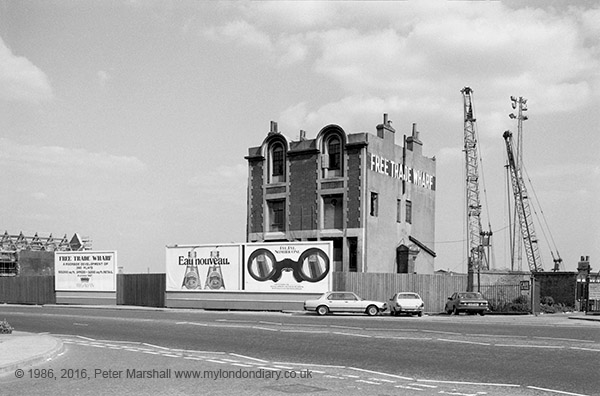
Free Trade Wharf, Limehouse, London. July 1986
But before I started did something I should have done several years ago but always put off – something I’m definitely Grade A* at.
I’m scanning today with the Epson V750 flatbed; it’s much faster than the Minolta Dimage Multiscan Pro, and with care the results are virtually as good. I’ve been having problems with the Minolta – the Firewire interface has become unreliable, working for a few scans then giving up halfway, and it had become very difficult to use. It’s the way most of these scanners eventually fail.
The scanner also has a SCSI interface, but getting the SCSI card I have to work in my current computer might be difficult – though I mean one day to try. But SCSI is really now a thing of the past.
For some time I’ve been photographing negatives instead of scanning them, and I had everything set up using the D800E – and then that decided to internally destruct. Again another thing I mean to try is to get it working sufficiently to use for this, but that’s another job I’m putting off. And although the images were sharp and detailed I also had problems with getting even illumination across the frame.
So I decided to use the Epson V750 flatbed that I have on my desk and have mainly used for making scanned ‘contact sheets’ and as a photocopier, or a quick method of getting web-size images from slides or negatives. It is a capable scanner, and the only real reason for not using it before is that I had other ways of scanning negs that were just marginally superior. I’ve used the V750 both at home and elsewhere to produce scans for books by a couple of other photographers, and they have been very happy with the results.
A new Neg carrier
One of the problems that I think Epson themselves acknowledge is that the 35mm filmstrip negative holder just isn’t quite up to the job. They’ve never I think said so, but when they came out with the V800 it had a new holder. Unlike that provided with the V700 and V750 it was not glassless but incorporated anti-Newton’s rings glass as well as more flexible height adjustment to ensure correct focus.
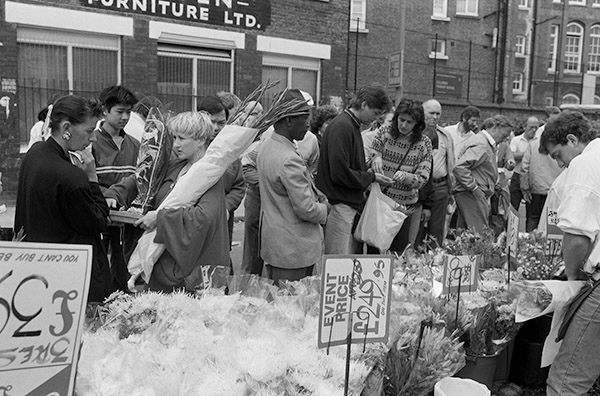
Columbia Market, London. July 1986
Looking at the pictures in the reviews, some of which commented on the improved design, it looked as if it would fit the D750, and I checked this was so before ordering one – rather expensively – from eBay. As well as the A-N glass, it also has better height adjustment than the D700/750 holder. Overall it does seem possible to get flatter negatives and better overall sharpness – though before things were already fairly good
Having the glass does of course make dust more of a problem. But with care and a powerful blower brush, along with the Pro Co Statbrush 2000* conductive brush I used in the darkroom and a lint-free cloth or two it isn’t too bad – and Photoshop sees off much of it very quickly. I seem to get slightly less dust spots than with the Minolta, and so far none of the problems with Newton’s Rings that sometimes plague my Minolta scans. It was an effect I hardly saw in the first year I used the scanner, then told another photographer I hadn’t seen them, after which they became a real problem.
Cleaning under the scanner glass
For several years I’ve been looking at the V750 and seeing smears and dust on the underside of the platen glass; I could clean the top easily, but these remained. The manual didn’t help, and on several occasions I’ve done a quick search on the web and read dire warnings from various people and decided perhaps it didn’t really matter.

Bridge over Regent’s Canal, Bridport Place, Islington, London. July 1986
This time I was a little more assiduous in my search, and found a few people who said it was a quick and easy job. A link to Epson’s exploded drawings of the scanner on the ‘Better Scanning’ site which has a page about dismantling various Epson models confirmed it was a matter of lifting the lighting module off from the scanner bed and then revealing and removing 4 screws and the top would lift off. And so it did.
The hardest part was removing the four plastic plugs which hide the screws, which I did by kind of digging at their edges with a craft knife and easing them up. They have a V on their top and are easy to spot, one fairly near each corner of the glass bed. Once the screws are removed the top can be pulled off – mine caught a bit at the front a needed a little persuasion. Fortunately fitting it back on again after cleaning turned out to be as simple.
Using Epson Scan
The Epson scanner software isn’t bad when used in ‘Professonal’ mode, though some features – like the ‘Thumbnails‘ which always seem to crop your images are best avoided. I do a Preview scan, click the Normal tab if thumbnails have appeared, then drag a marquee roughly around the first neg I want to scan, and click to ‘zoom’ in. It’s best then to adjust the marquee to be entirely inside the image area to avoid any black and white areas outside the frame which might affect exposure before clicking on the auto-exposure icon.
Auto-exposure will always give a less than optimal result, but does get in you the ballpark. It’s best to keep the Histogram panel open all the time you are scanning and click on the ‘show output’ button to check if there is any black or white clipping. Adjust the input values to get rid of all or almost all of this, then move the midpoint slider to get the image looking roughly how you want it.
I can’t see any real point in not having the output as the default visible in this panel as it is what you really need to see, although sometimes you might want to be able to view the input. It’s one of several minor annoyances about the software, but otherwise it works well. I could instead use Vuescan, which I’ve used with the other scanners, but somehow never bothered with the Epson. Perhaps I’ll download the latest version and give it a try, certainly when I start to scan some colour negs.
It’s best to scan in 16 bit grey for black and white (48 bit RGB for colour) as then you can make final adjustments to brightness and contrast in Photoshop (or other image editor.) You are going to have to open the images in Photoshop anyway to retouch the dust etc. So concentrate on getting all you can from the neg by avoiding clipping.
Re-adjust the marquee boundaries to the edge of the image, and then you are ready to scan. Of course you will have already set the directory for the image to save in and for it to be saved as 16 bit tiff, as well as a suitable stem for the name – to which Epson Scan with add 001, 002…
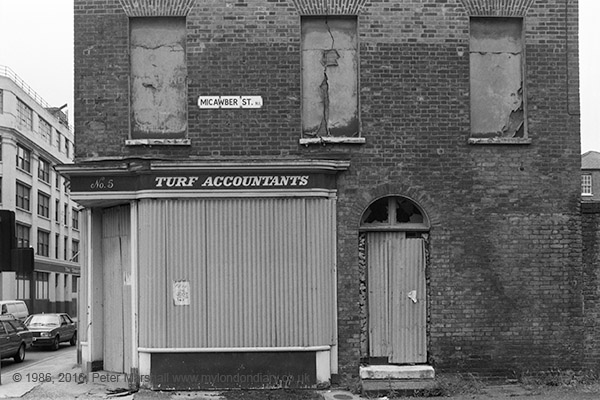
Closed Turf Accountants, Micawber St, Islington, London. July 1986
When the scan has saved, click on ‘Full’ in the preview pane, shift the marquee to the next image on the page you want to scan, and then ‘Zoom’ to view it and adjust exposure. Only use the auto-expose icon if it comes up way out, otherwise it is generally quicker to adjust from the previous values. And ‘unsharp mask’ has a habit of sneaking itself on. You don’t need it – if you want sharpening, Photoshop can do it better.
One further hint. Always go through the negs and decide exactly which are worth scanning – I mark the contact sheets, but if you don’t have these, you can write down the negative numbers. Otherwise if you are like me you will end up scanning twice as many.
* Not quite as effective as those Polonium 210 based StaticMaster brushes we used to use, but which now appear unobtainable in the UK. Quite safe so long as you remembered not to stir your tea with them!
______________________________________________________
There are no adverts on this site and it receives no sponsorship, and I like to keep it that way. But it does take a considerable amount of my time and thought, and if you enjoy reading it, the occasional small donation – perhaps the cost of a beer – would be appreciated.
My London Diary : Buildings of London : River Lea/Lee Valley : London’s Industrial Heritage
All photographs on this and my other sites, unless otherwise stated, are taken by and copyright of Peter Marshall, and are available for reproduction or can be bought as prints.
To order prints or reproduce images
________________________________________________________
Just a word for those using a Mac and the latest software El Capitan: The Epson scan has an issue if used to auto scan, it stutters and waits after each scan but can be prompted by tediously clicking on the progress box each time to urge it into progress. the patch fix has been well hidden by Epson and Apple both of whose auto updaters report all is up to date, the patch is at:
http://esupport.epson-europe.com/ProductHome.aspx?lng=en-GB&data=CuG9aEks7iWy7BKvNxnwbAEPVs0LYMVLTflFNuWQqLoU003D&tc=6
That may need some effort to cut and paste so search on Epson Scan Patch for OSX 10.11 1.0 on http://esupport.epson-europe.com/
Useful for those on Mac, thanks Chris. I’m currently on Windows 7, though MS are getting increasingly aggressive at trying to get me to upgrade to Win 10. But having heard the problems some others have had I’m not willing to risk possible problems with getting scanners, tablet etc to work.